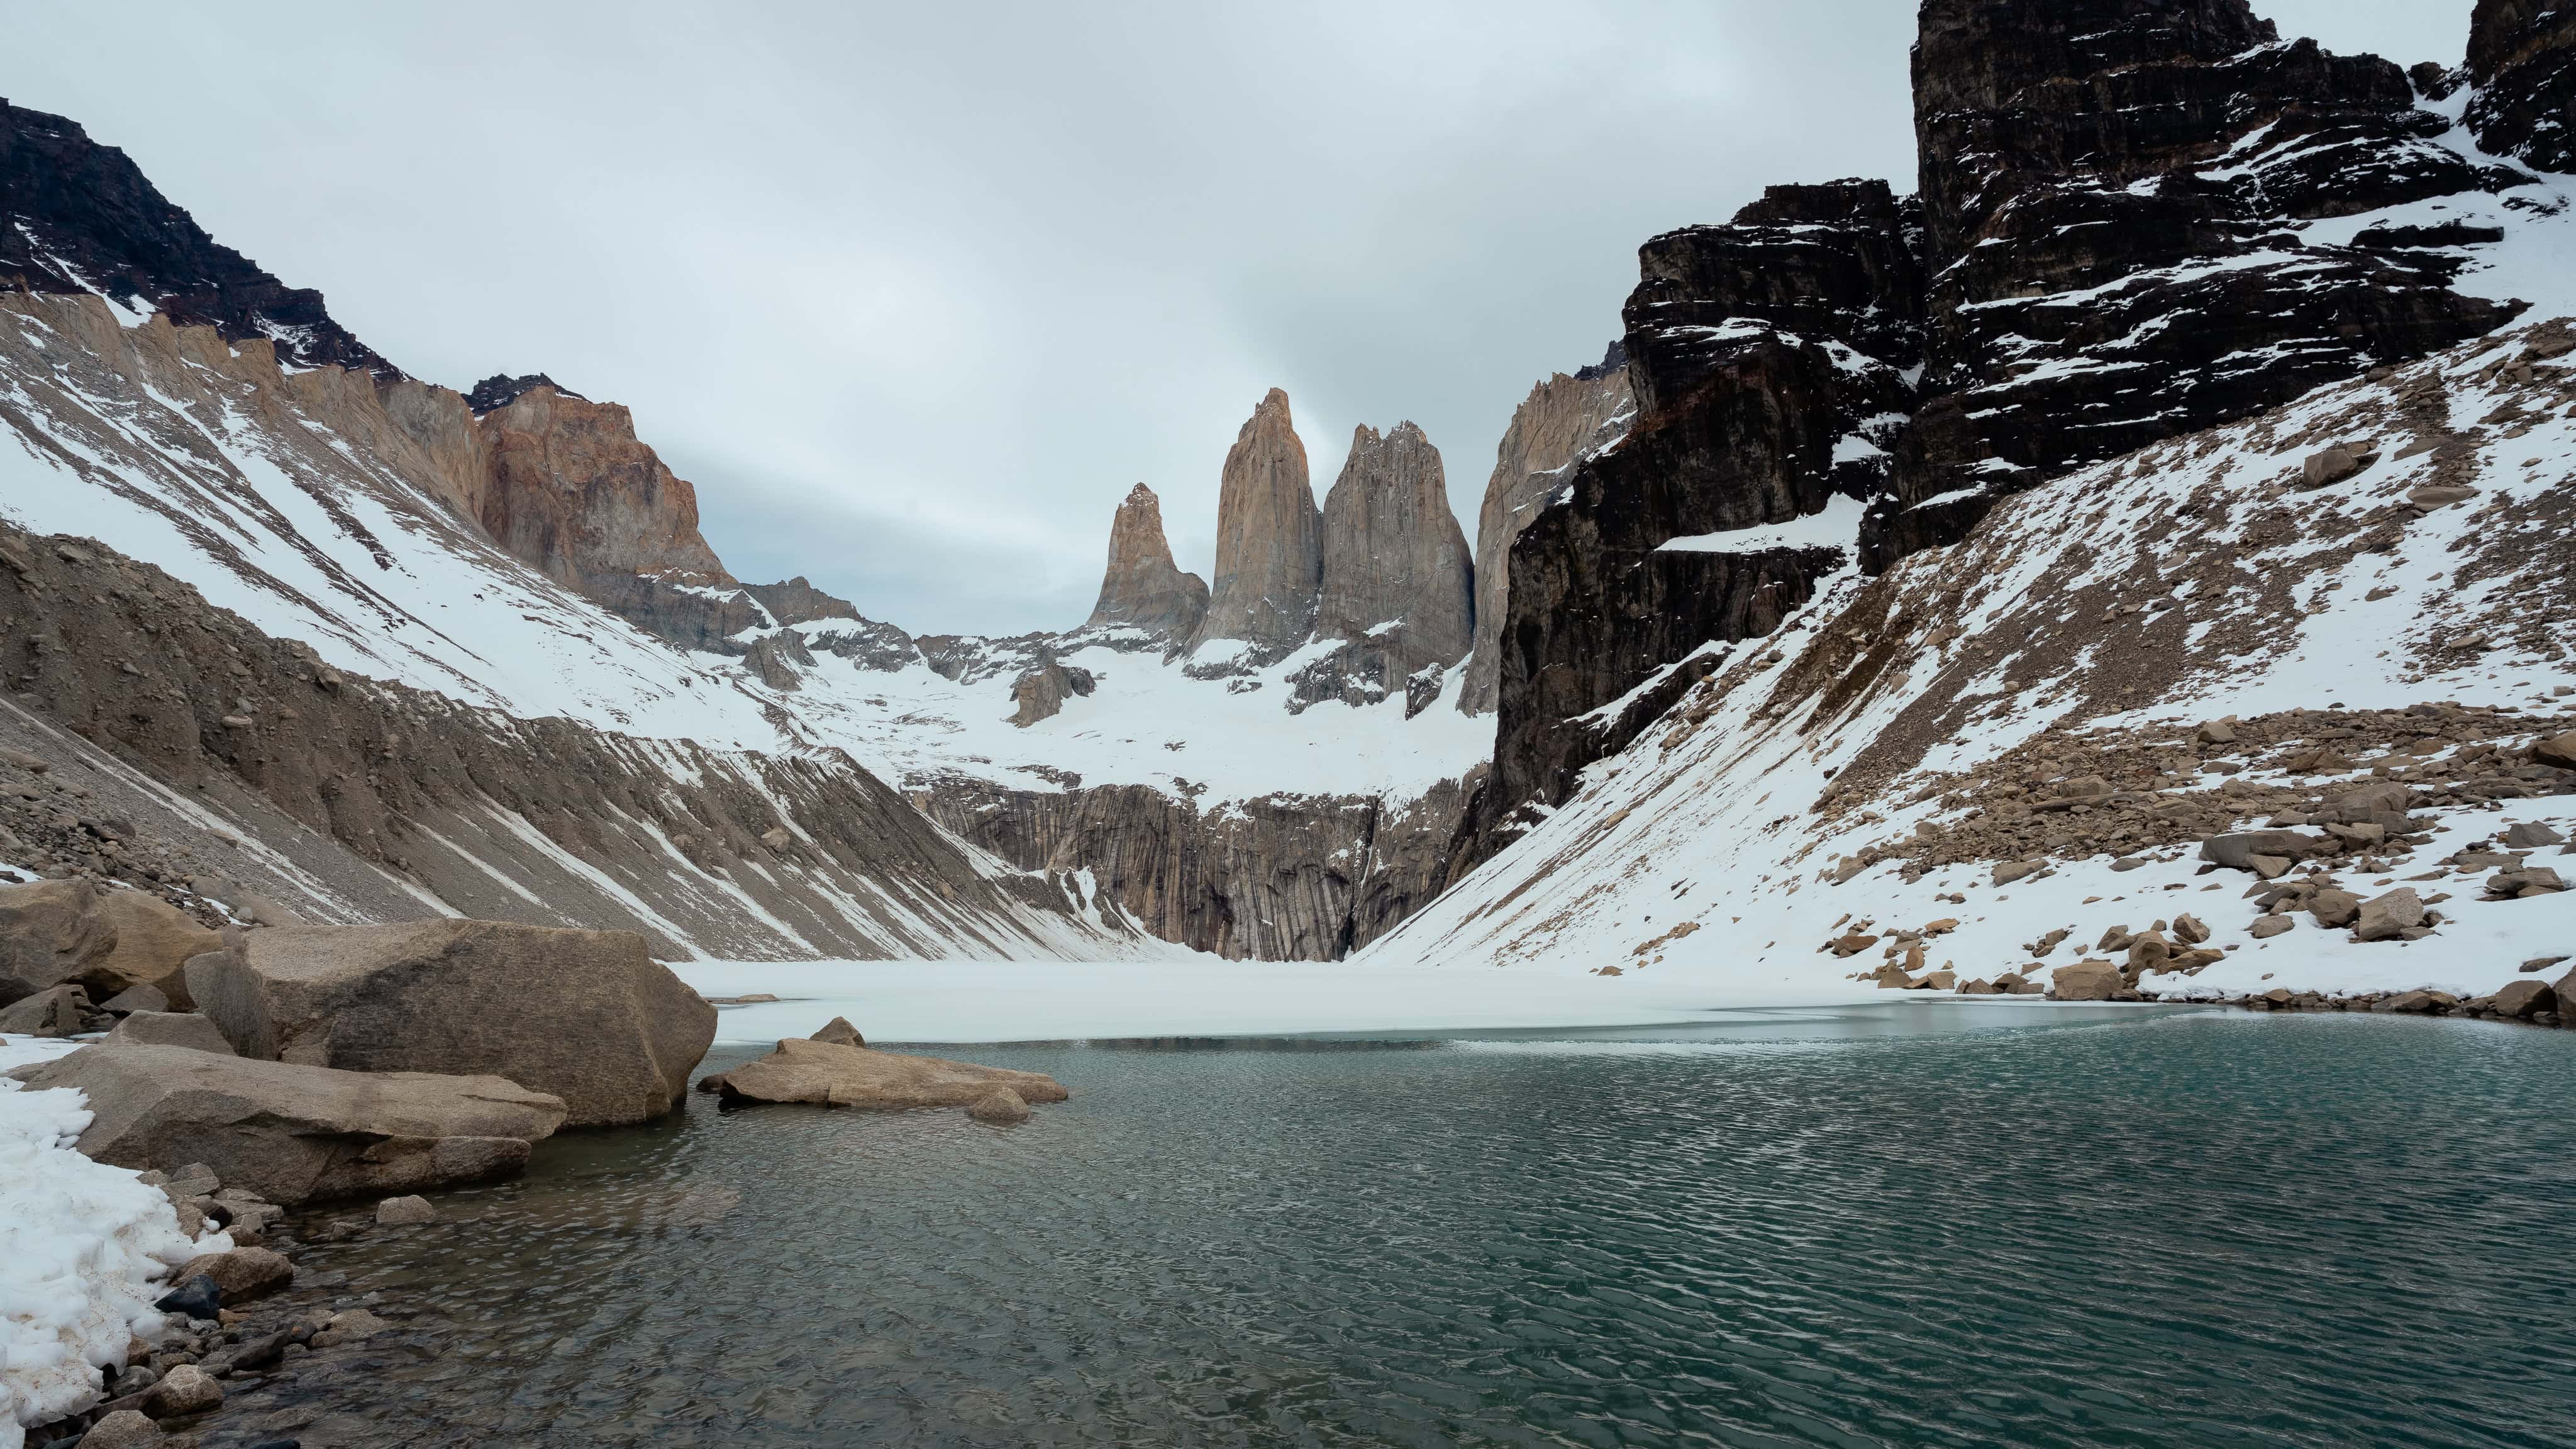
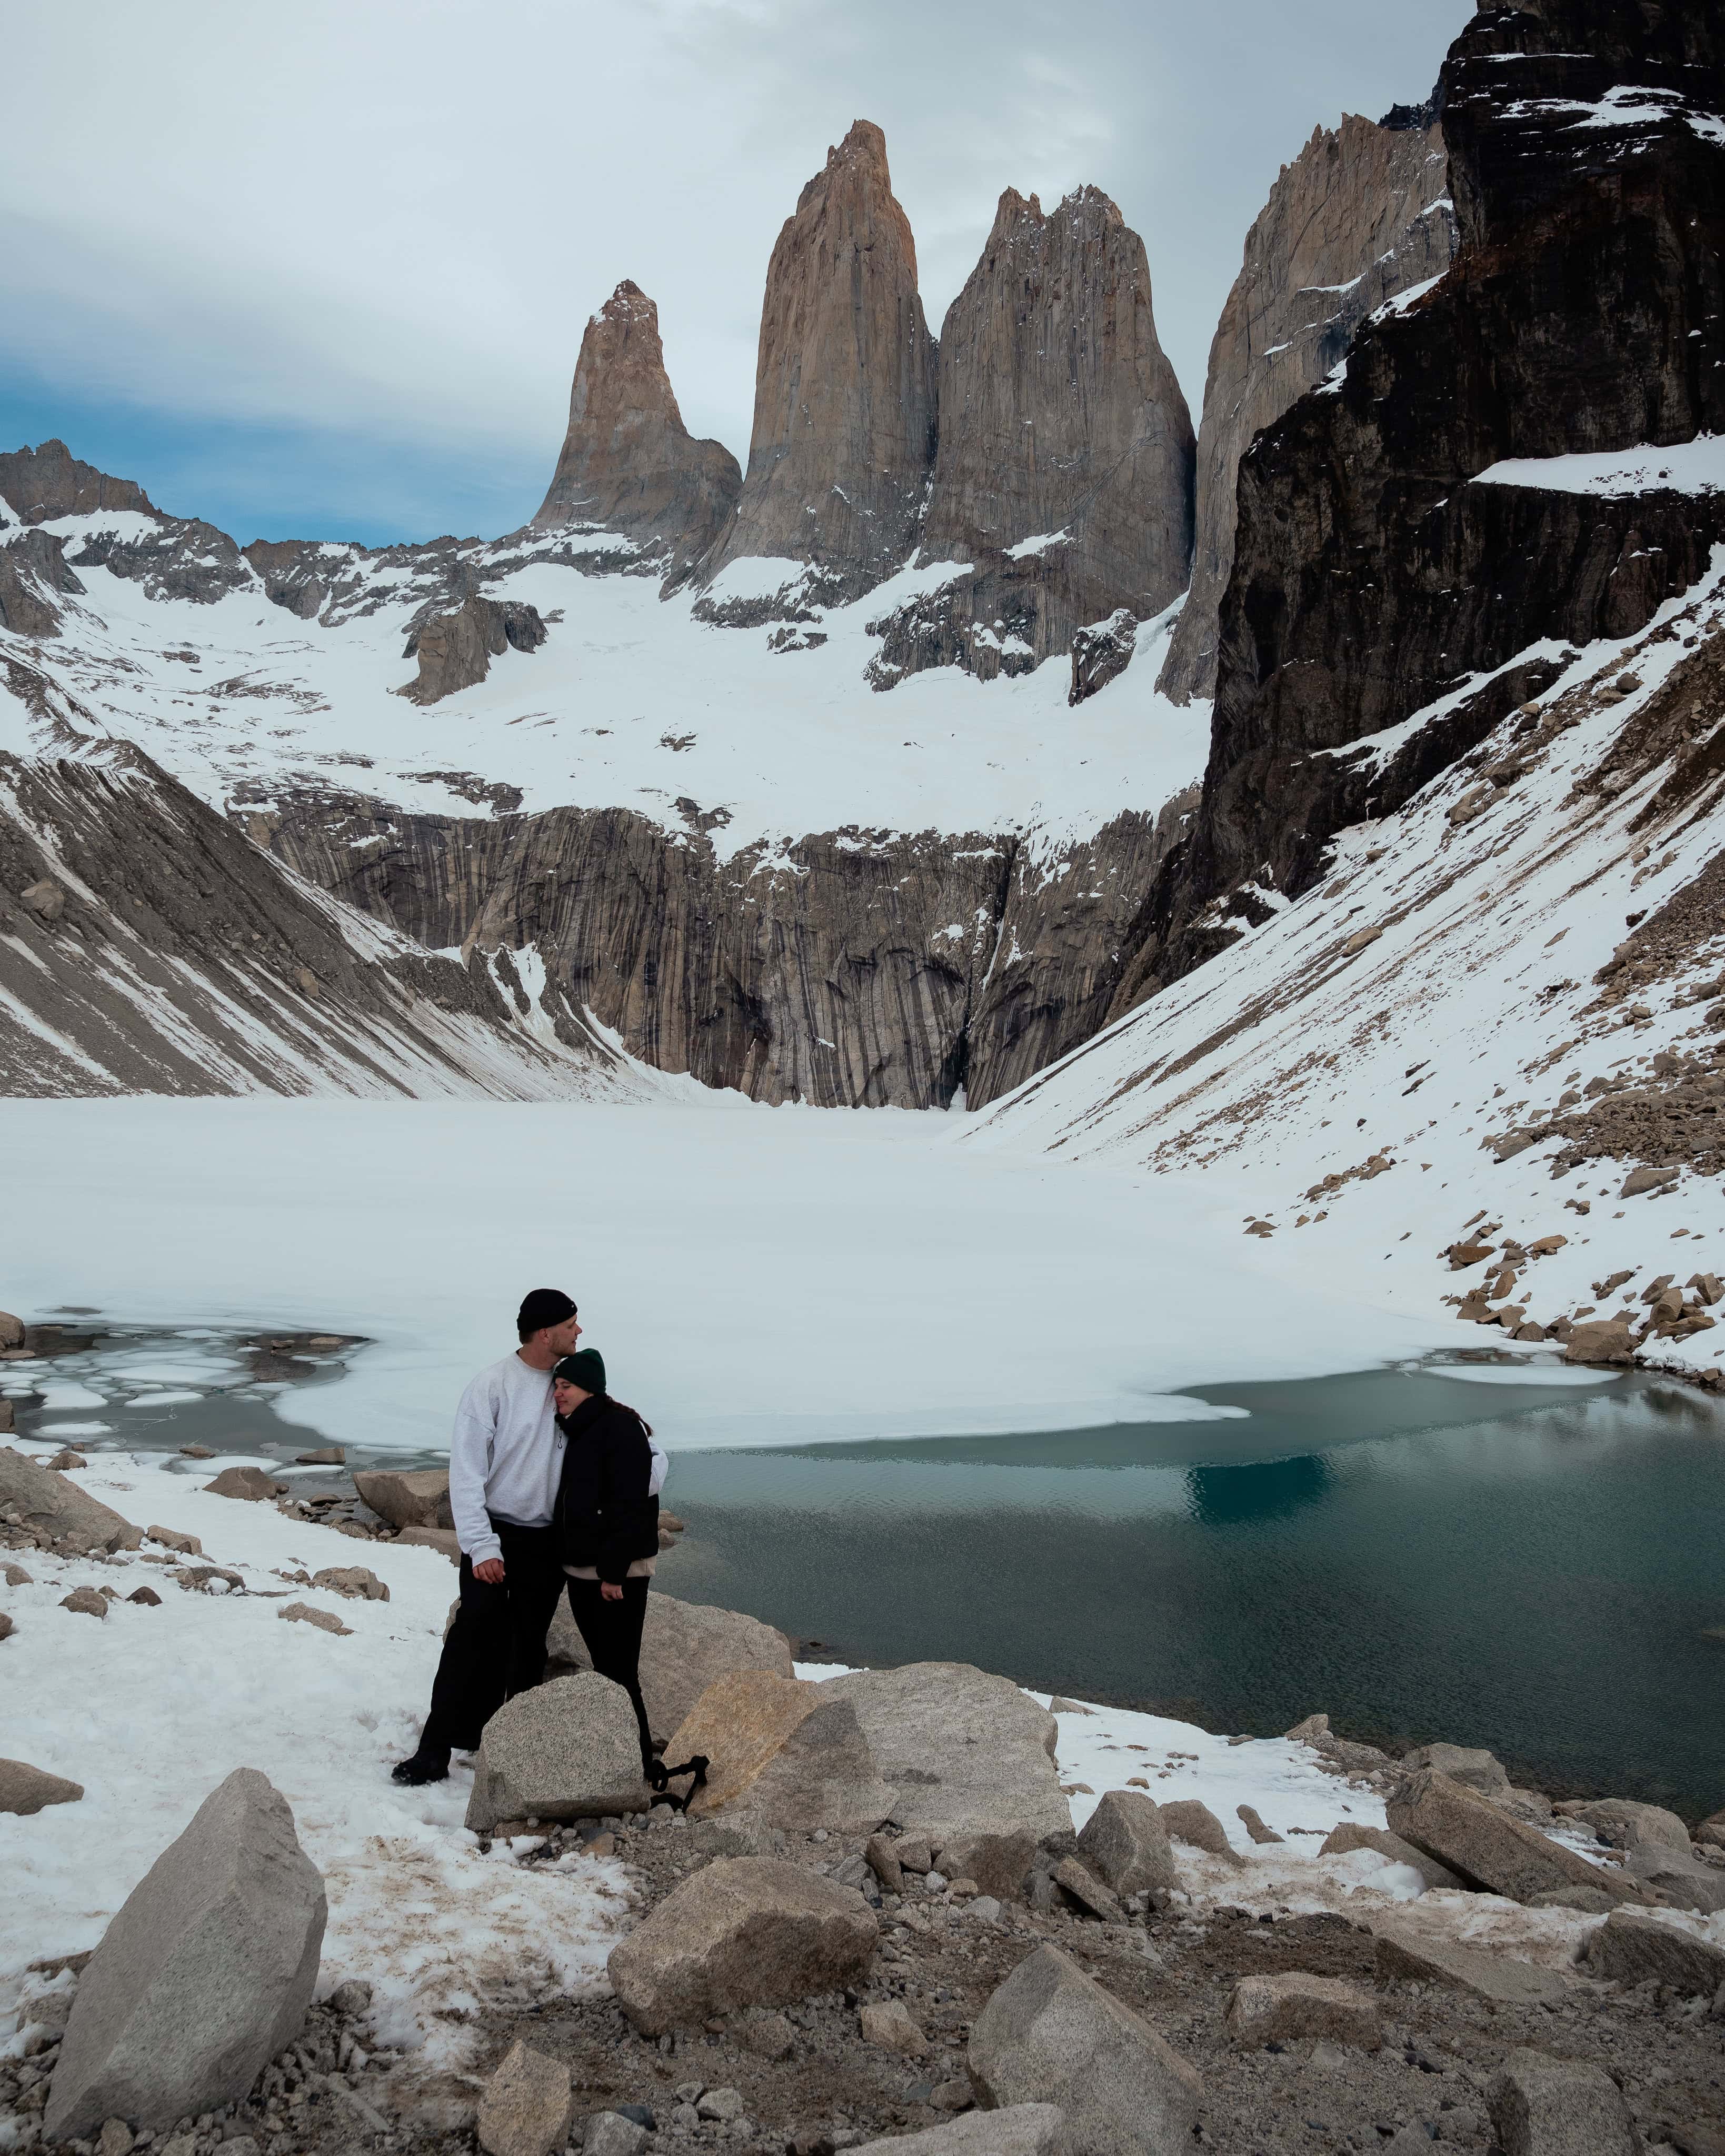
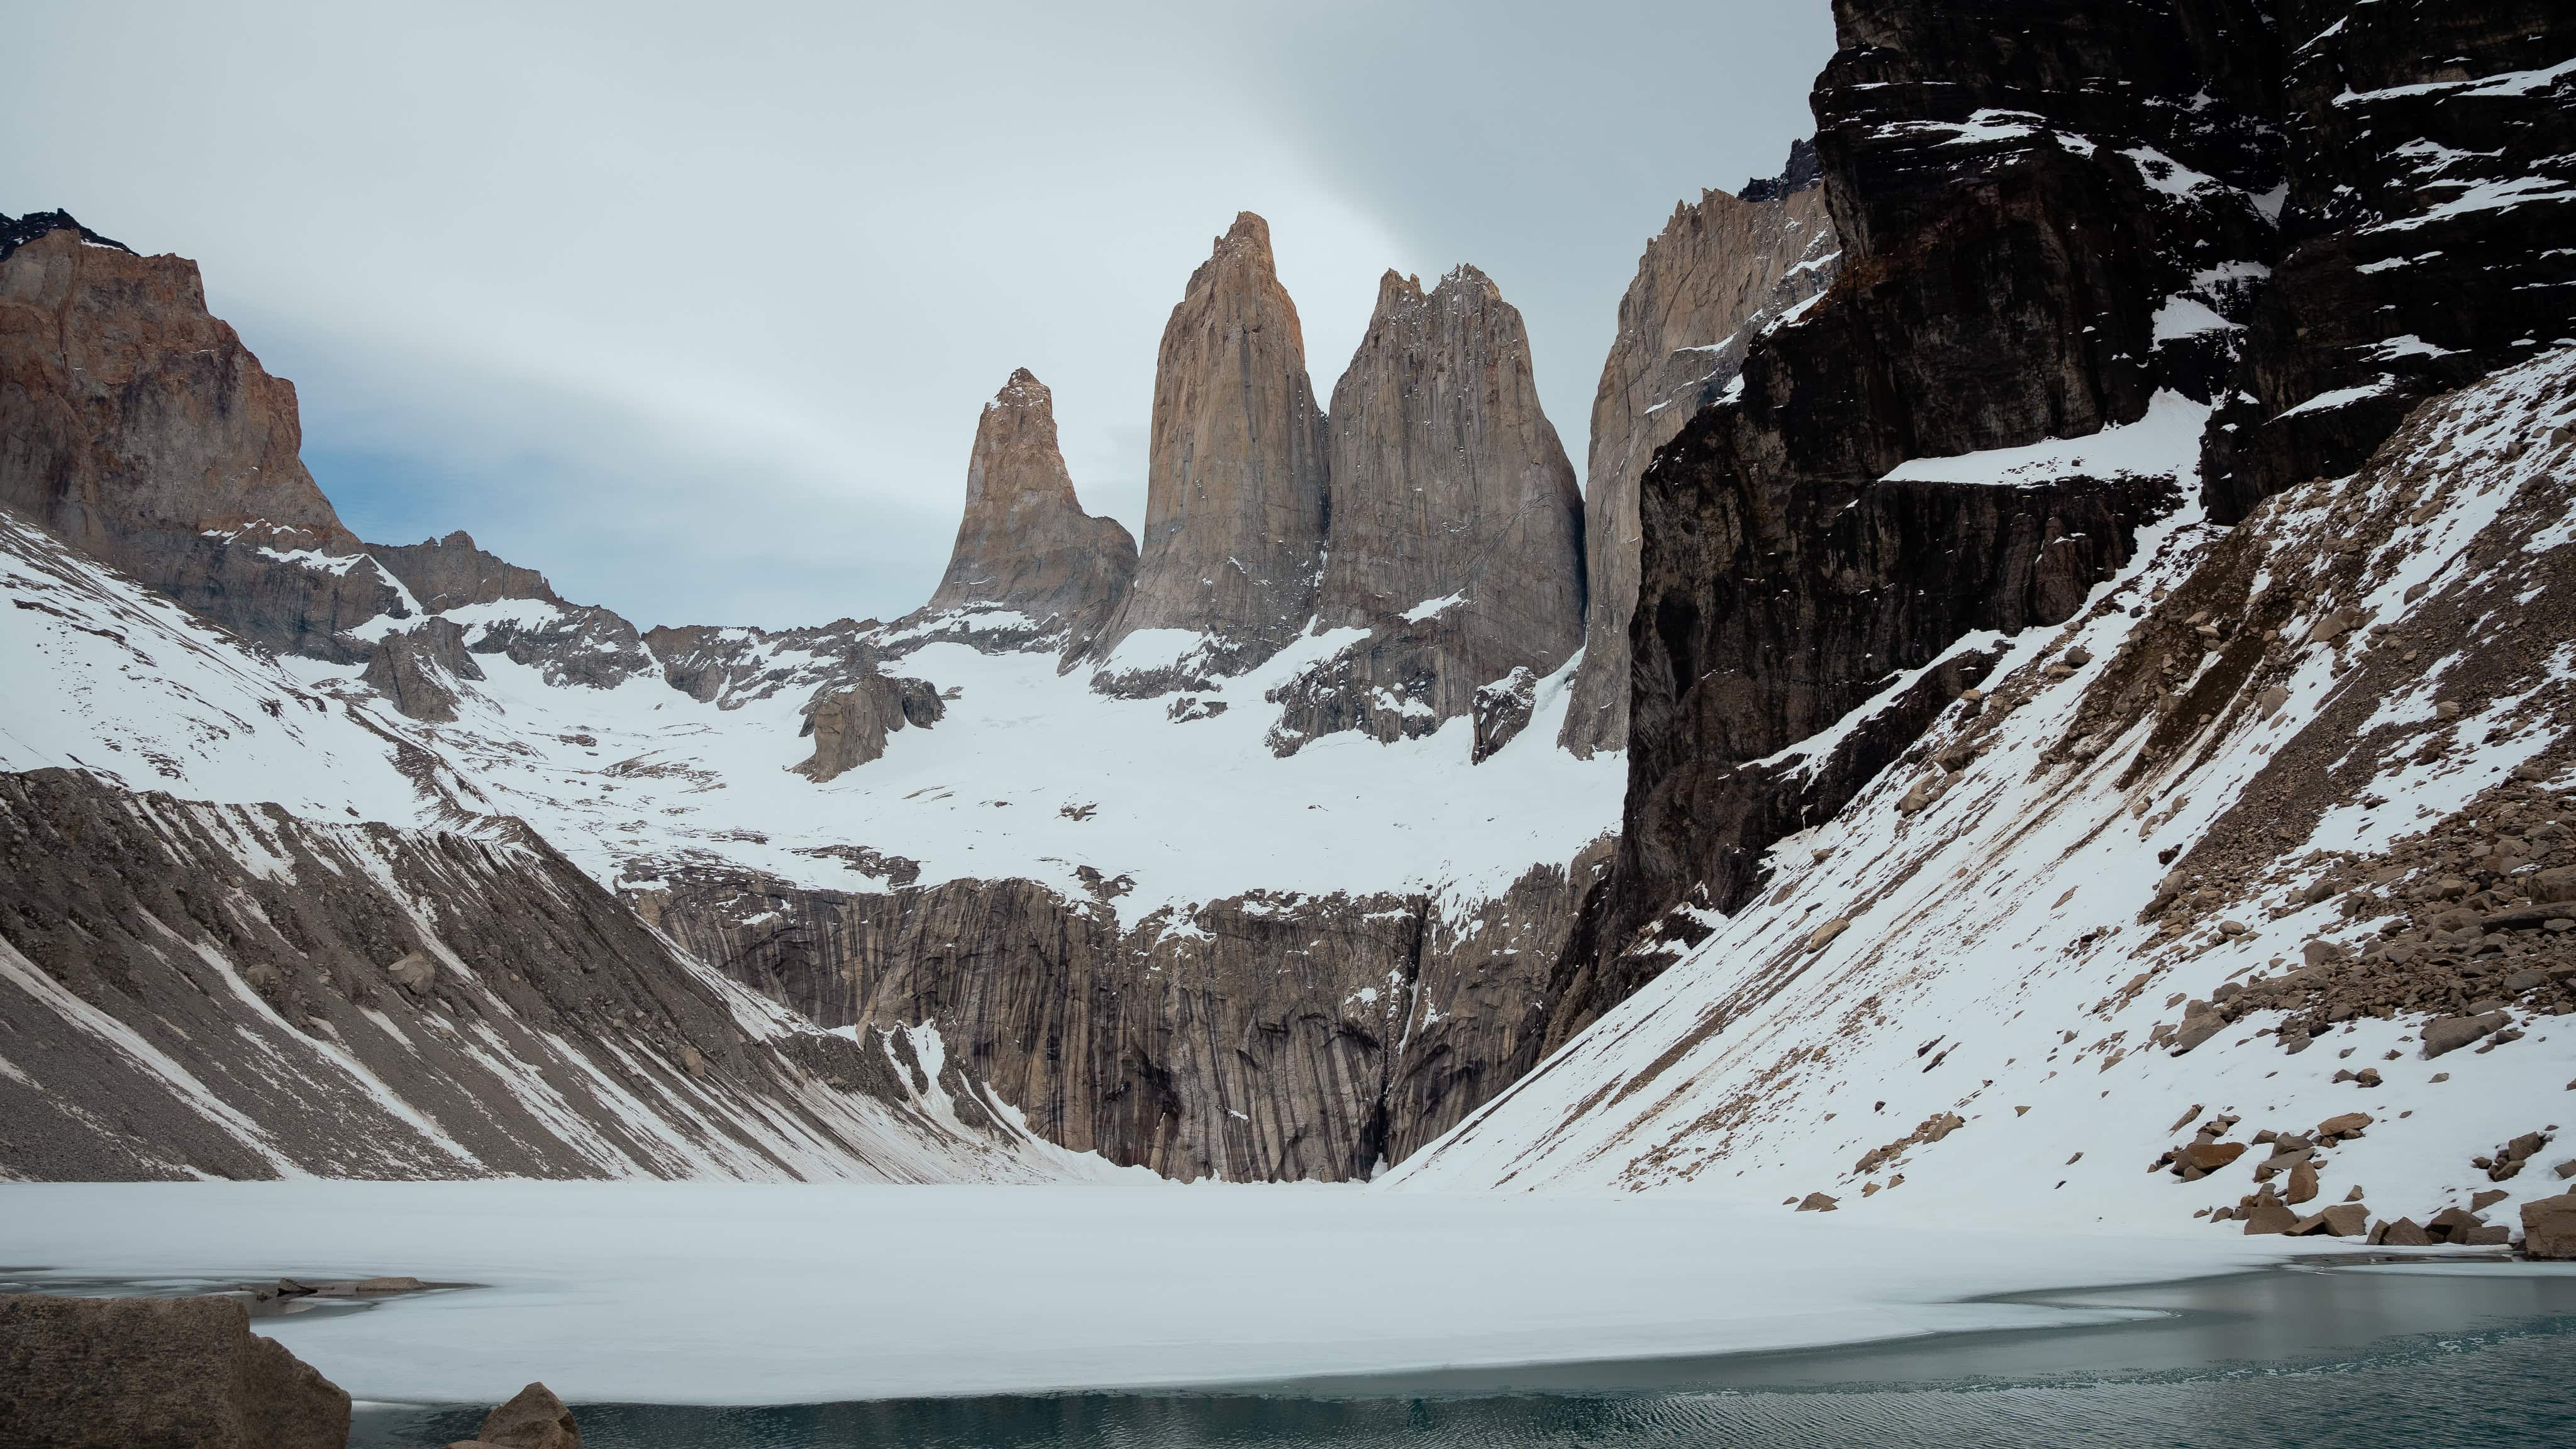
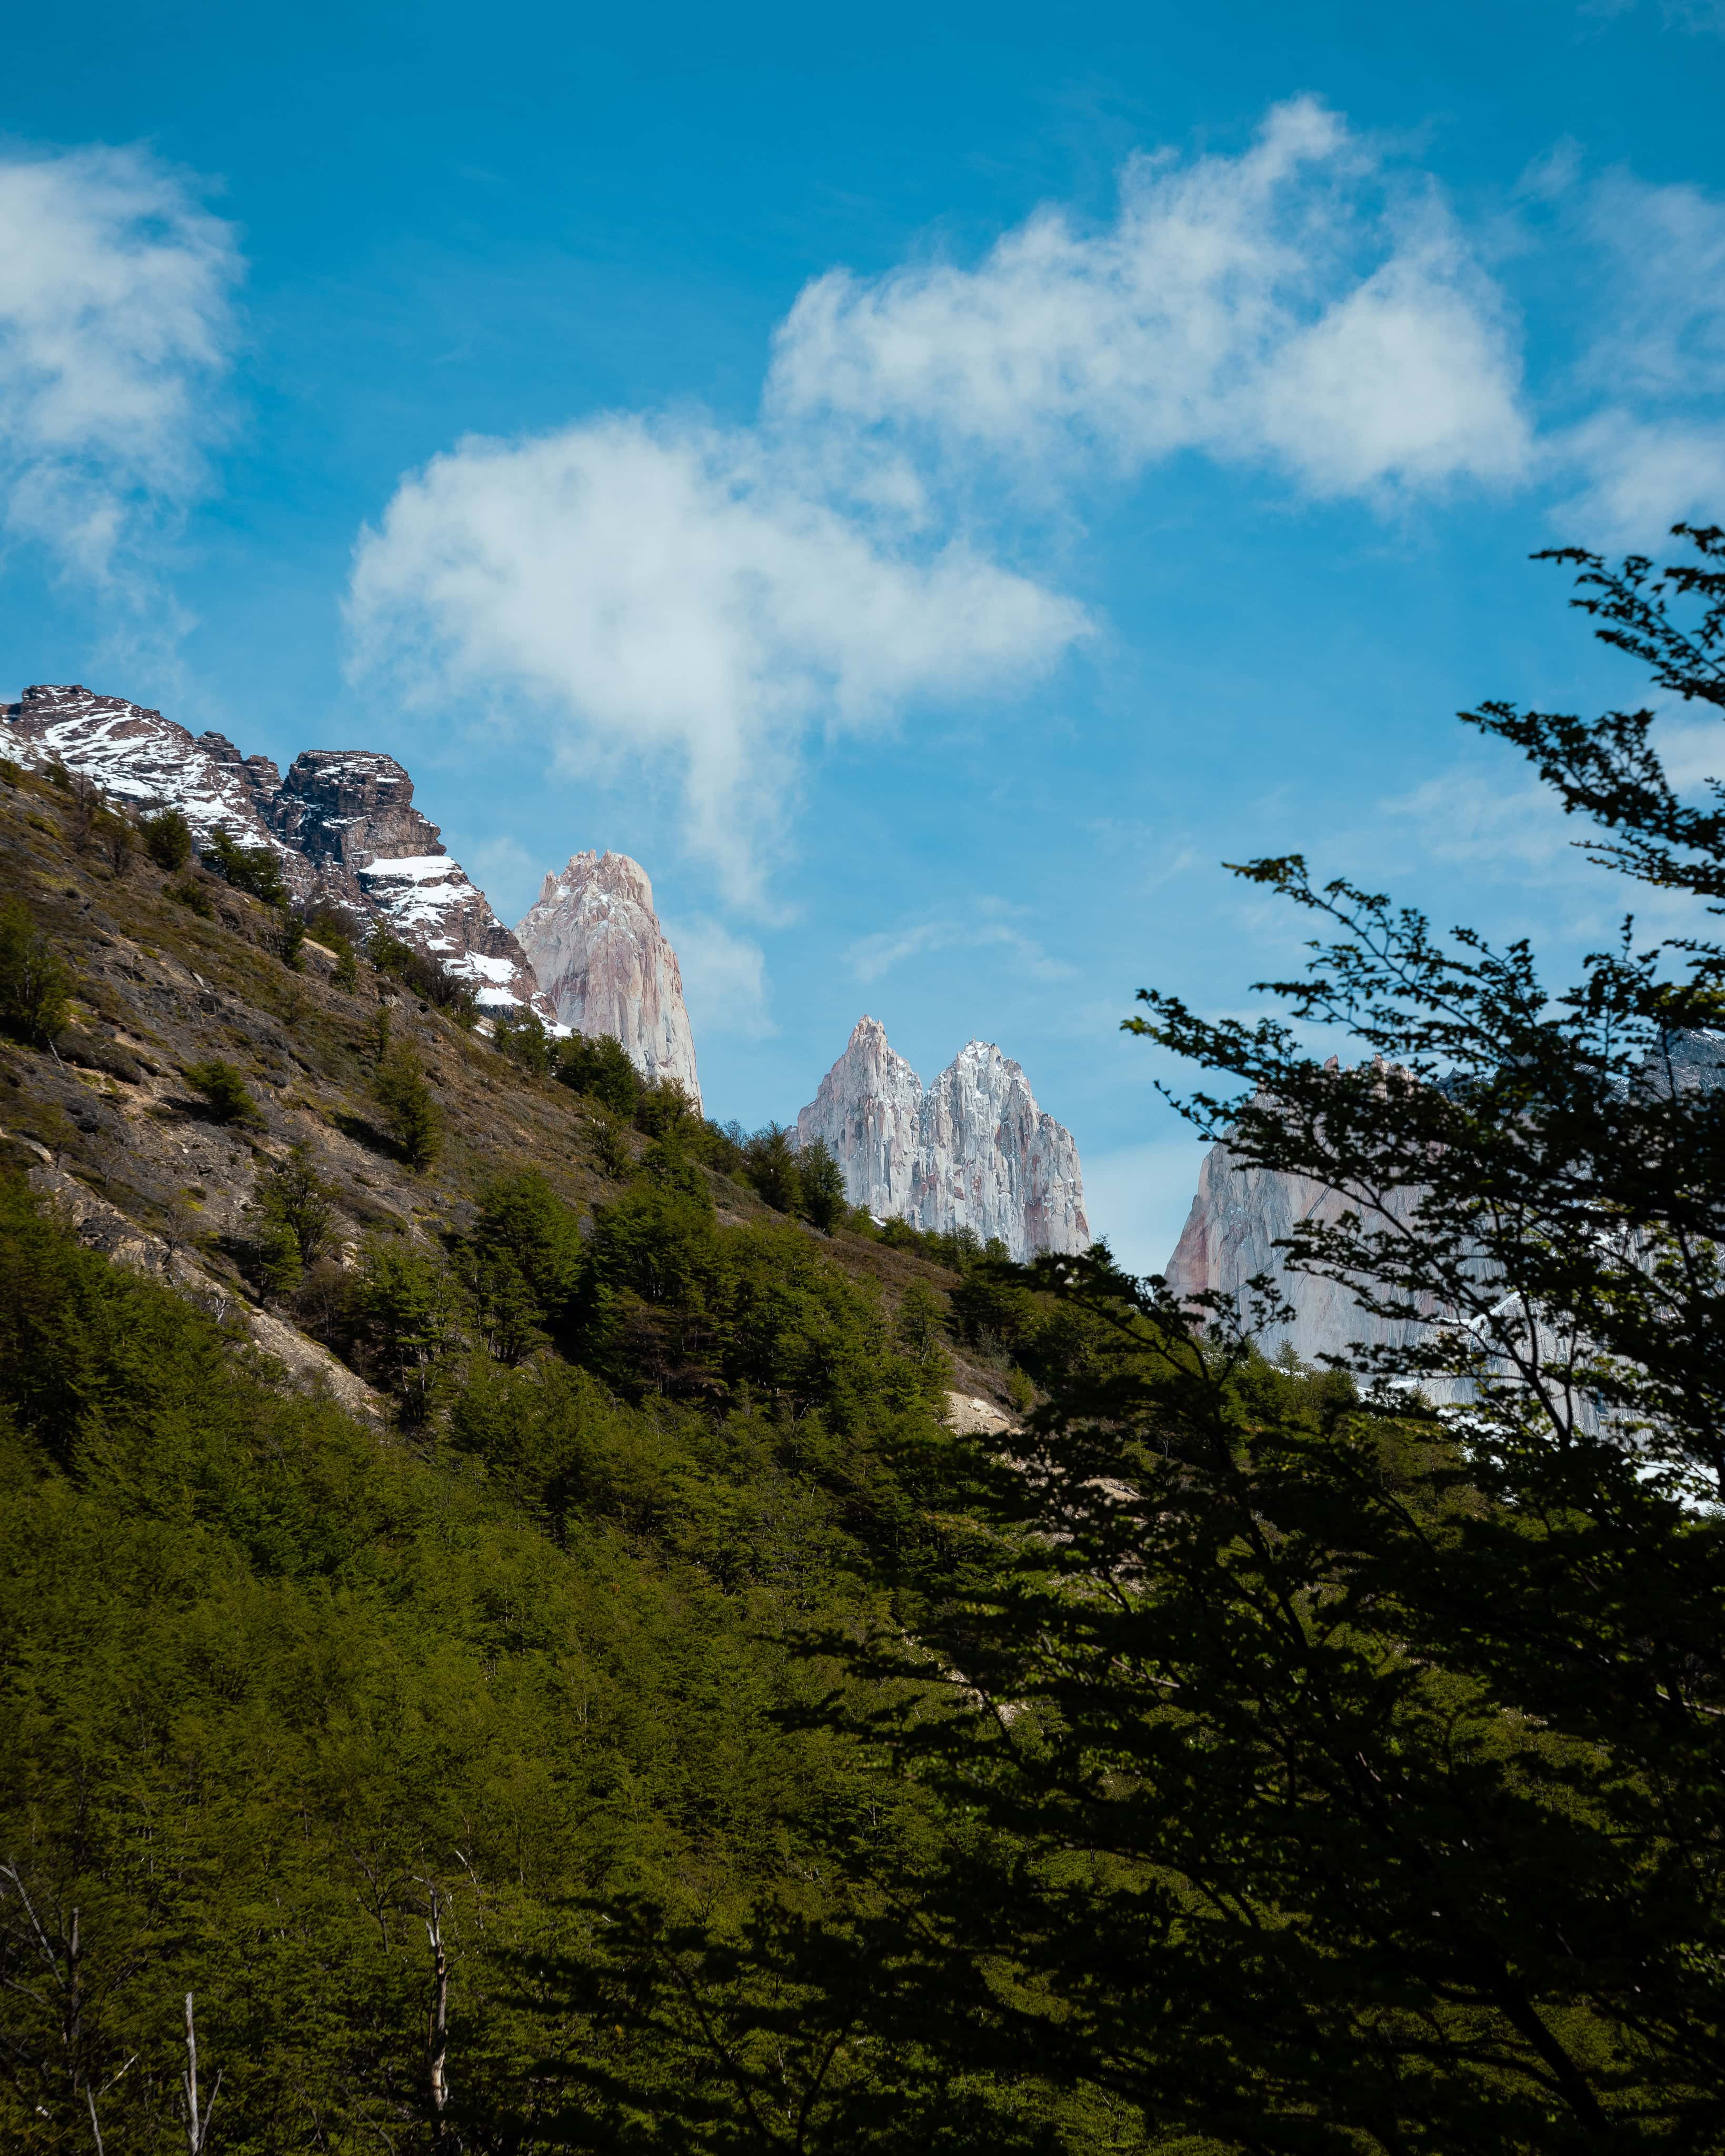
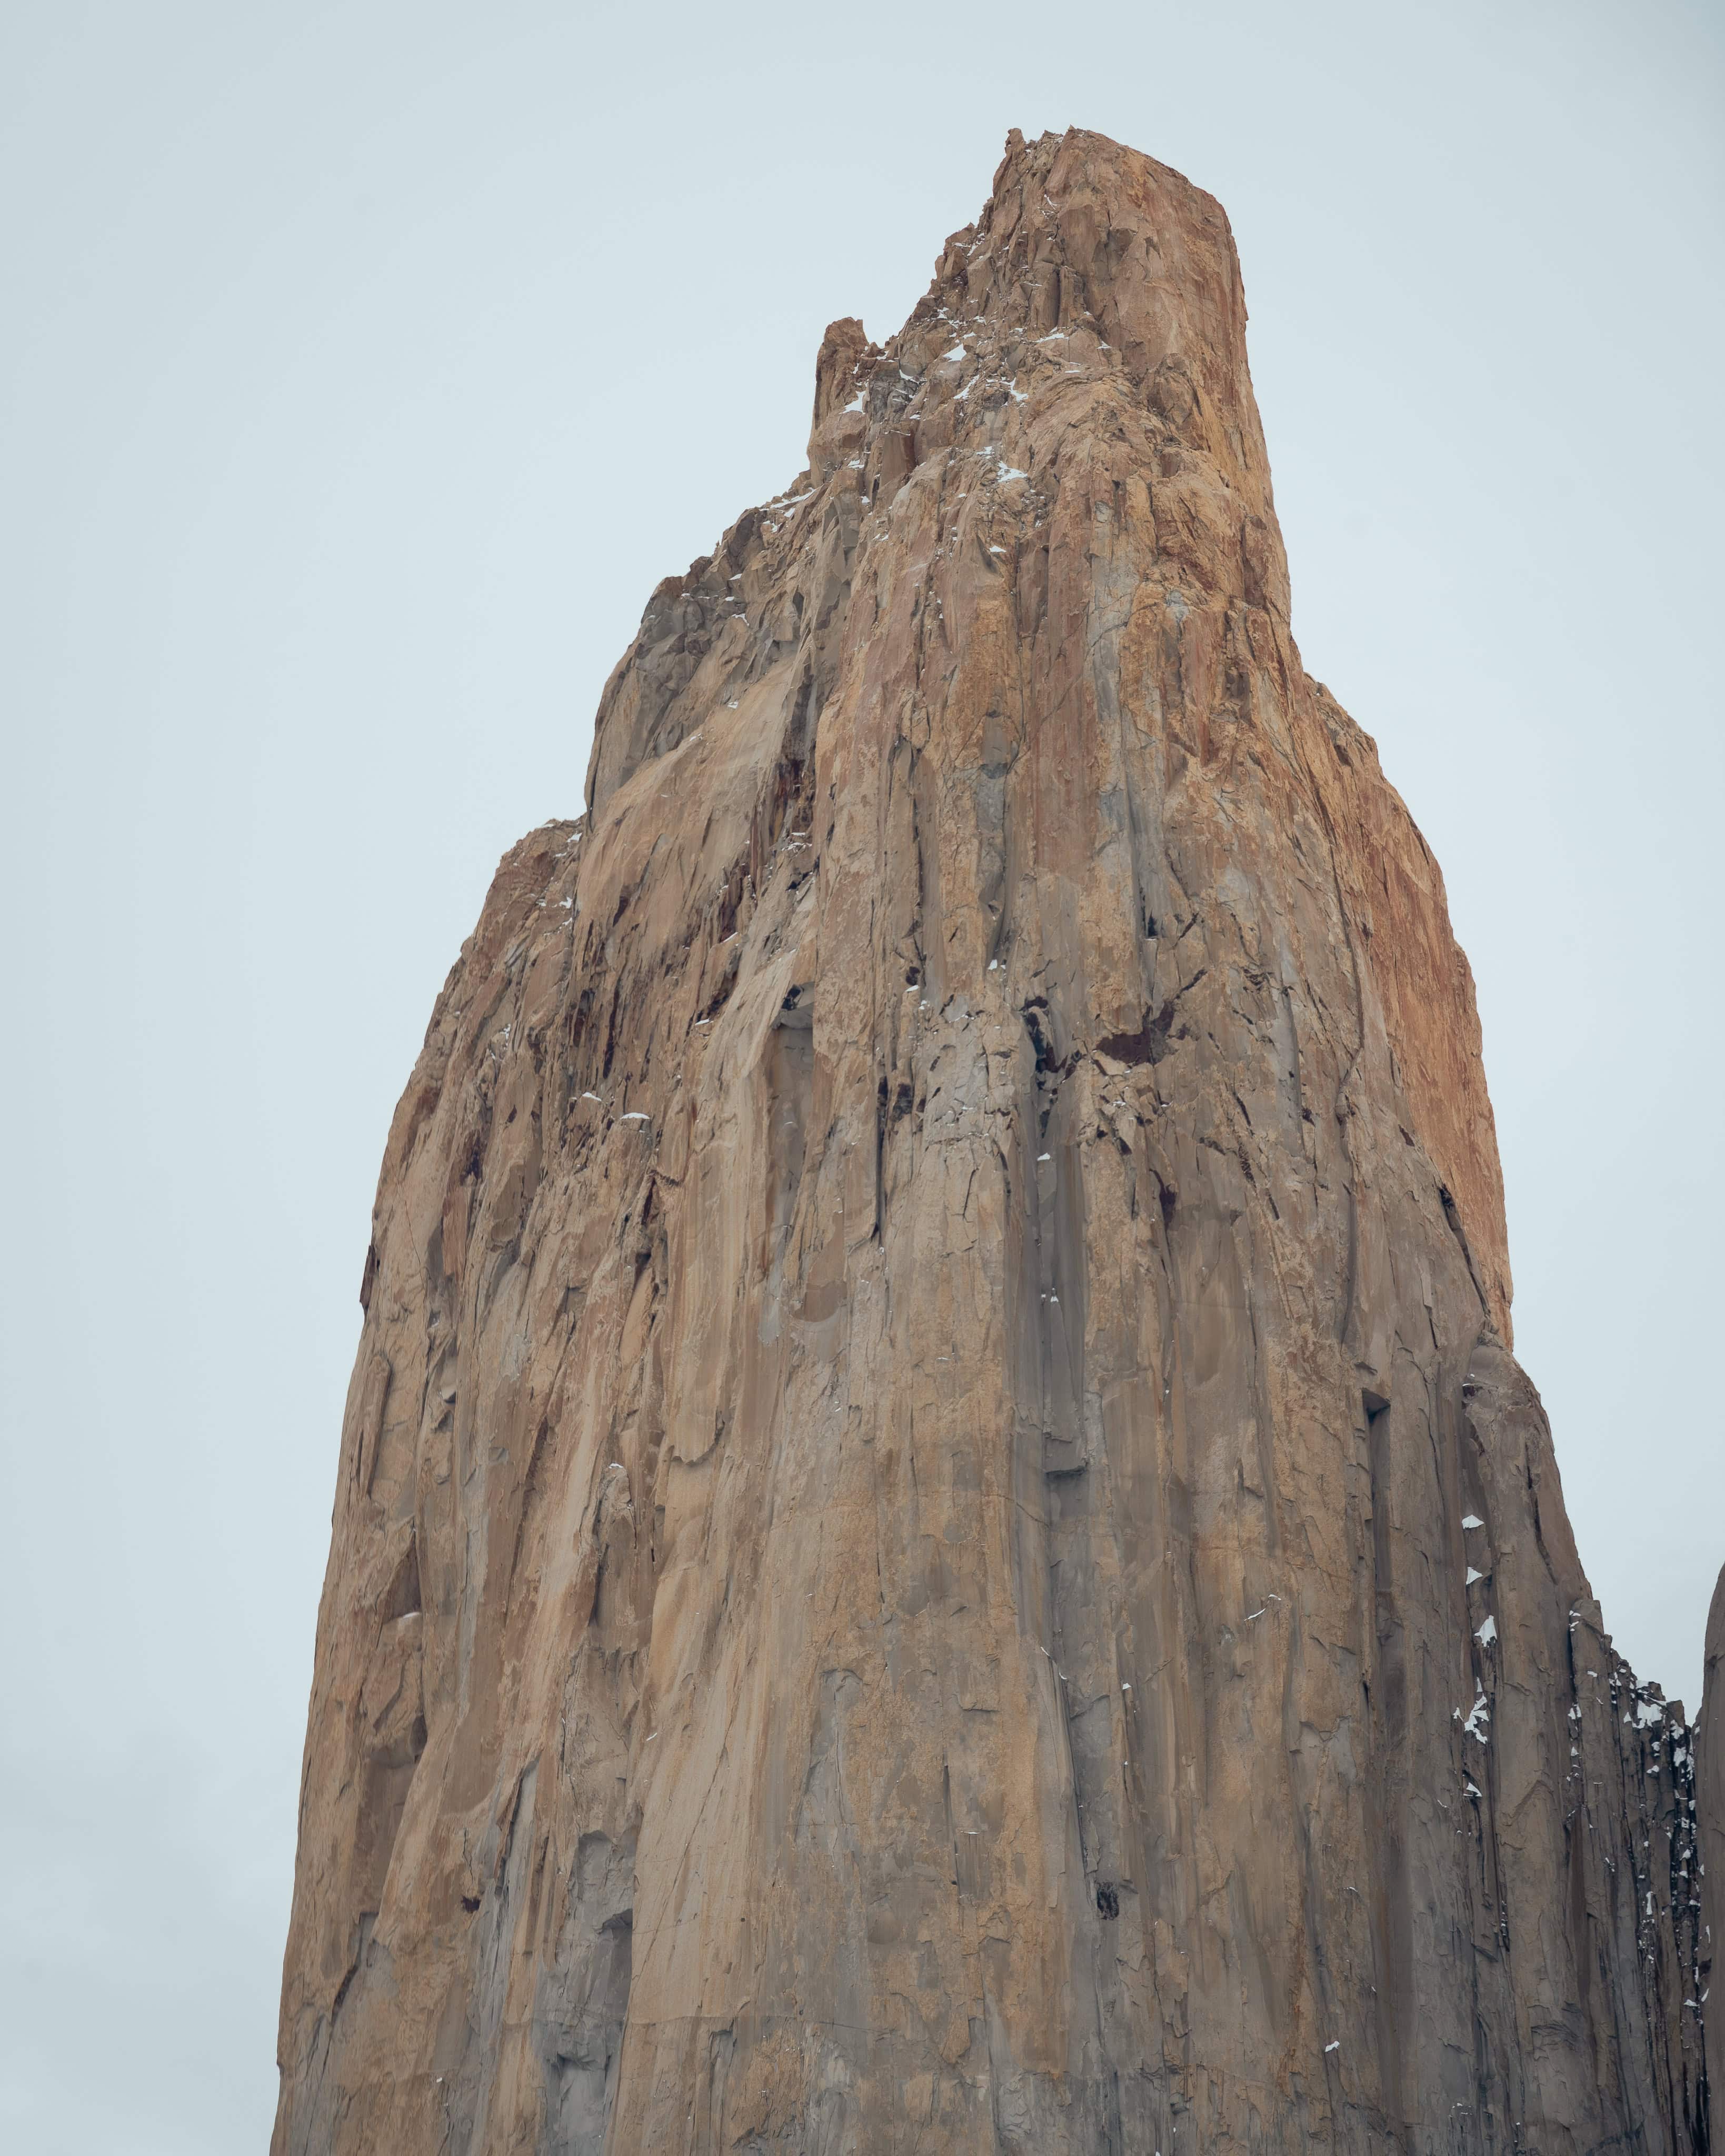
The Torres del Paine, three steep granite towers, are the most striking peaks in the national park of the same name in Chilean Patagonia. Rising like slender, cloud-shrouded needles above the turquoise waters of Laguna Torre, they offer visitors a breathtaking panorama from the famous Mirador viewpoint. The combination of rugged granite peaks, clear glacial lakes and the vast Patagonian steppe makes this one of the most iconic day hikes in South America. Many visitors plan their entire Patagonia tour around this hike.
Important facts at a glance
- Best time to visit: Peak season is November to March; October/spring is possible, but there may still be snow on the summit (as was the case during our visit).
- Distance (round trip): Approx. 18–22 km, depending on the starting point. 18 km from Hotel Las Torres and 22 km from the Welcome Centre.
- Opening hours and time limit: Last entry is approximately between 9 and 10 a.m., and the final ascent is cleared from 3 p.m. (in summer, approximately 4 p.m.). The descent must be completed before dark.
- Elevation gain/max. : Altitude: The elevation gain is approximately 900 metres, and the noticeable final ascent makes the trail challenging.
- Duration: 6–10 hours (depending on fitness, breaks, and weather conditions).
- Starting point: Usually the Welcome Centre or directly at the Hotel/Refugio Las Torres. The signposted Sendero trail starts from there.
- Difficulty: Challenging – long stage, changing conditions and a steep final section. Fitness is recommended!
- Park entrance/fees: There is an entrance fee for the national park, with prices varying depending on the time of year. You can get ticktes here!
A detailed description of the stages (step by step)
The following sequence of steps outlines the traditional route of the day hike from the official starting point at the Welcome Centre/Hotel Las Torres to the Mirador viewpoint.
1) Welcome Centre to the foot of the first ascent (approx. 2 km, relatively flat)
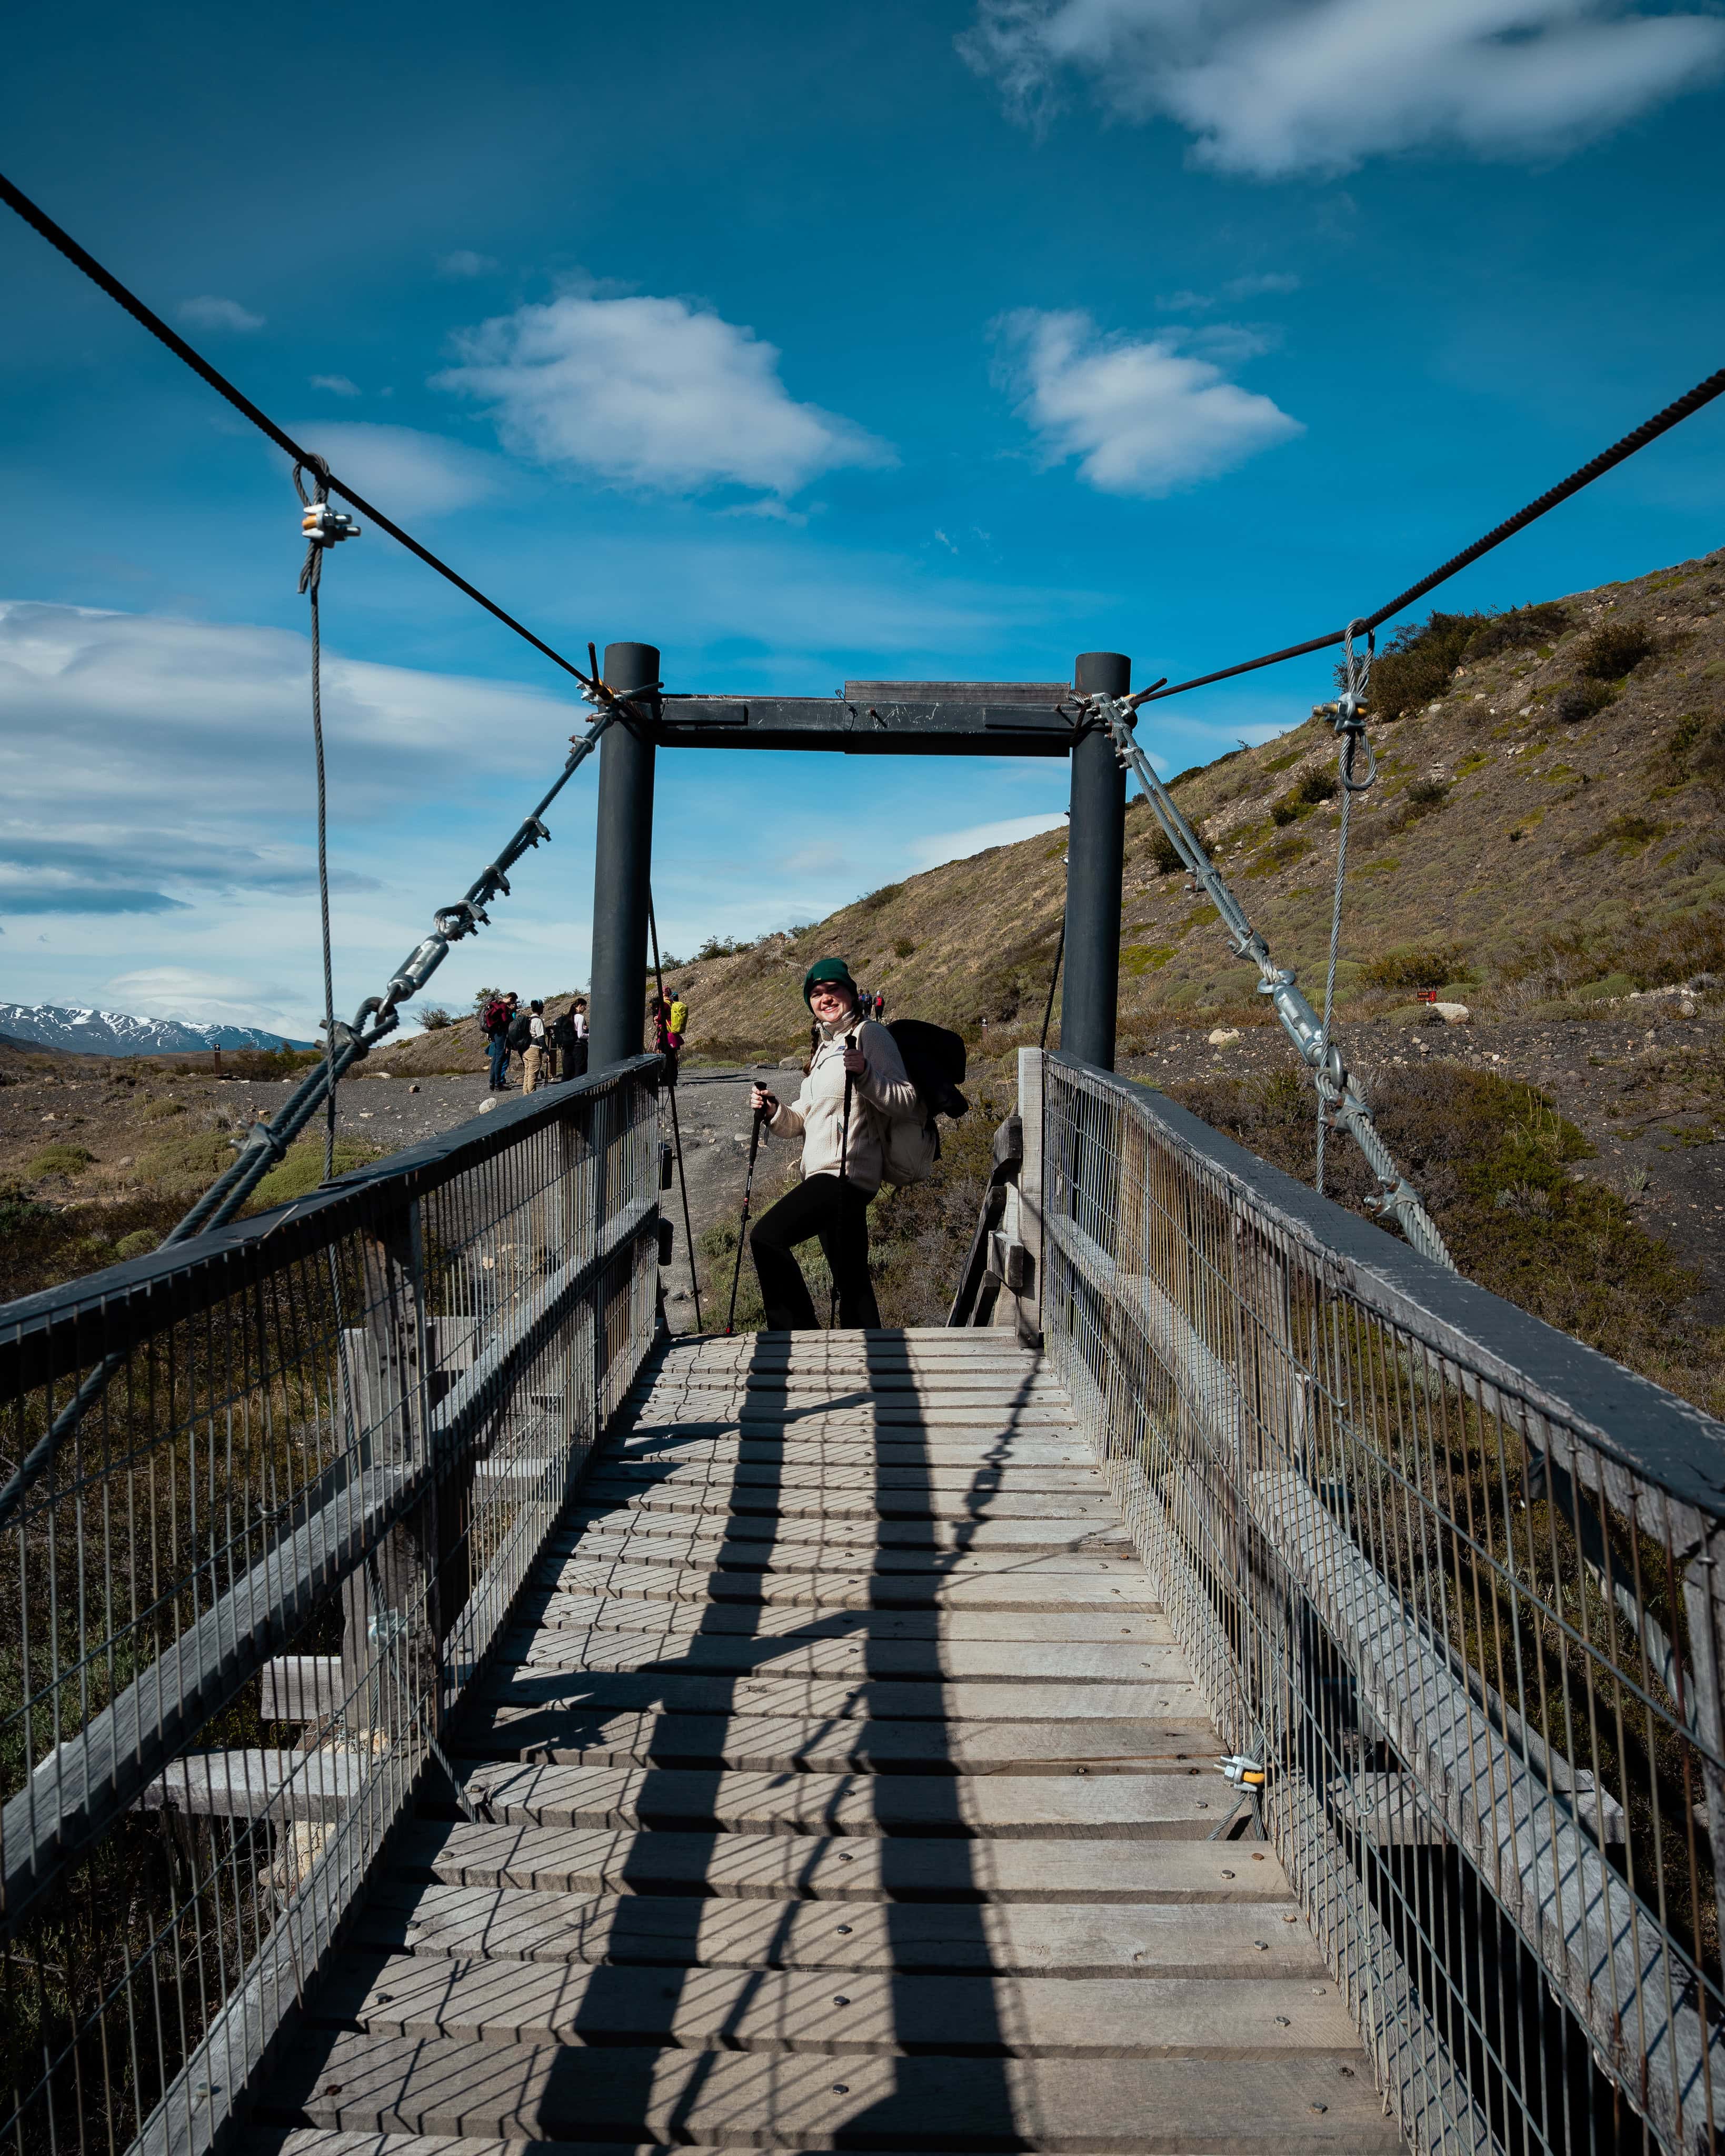
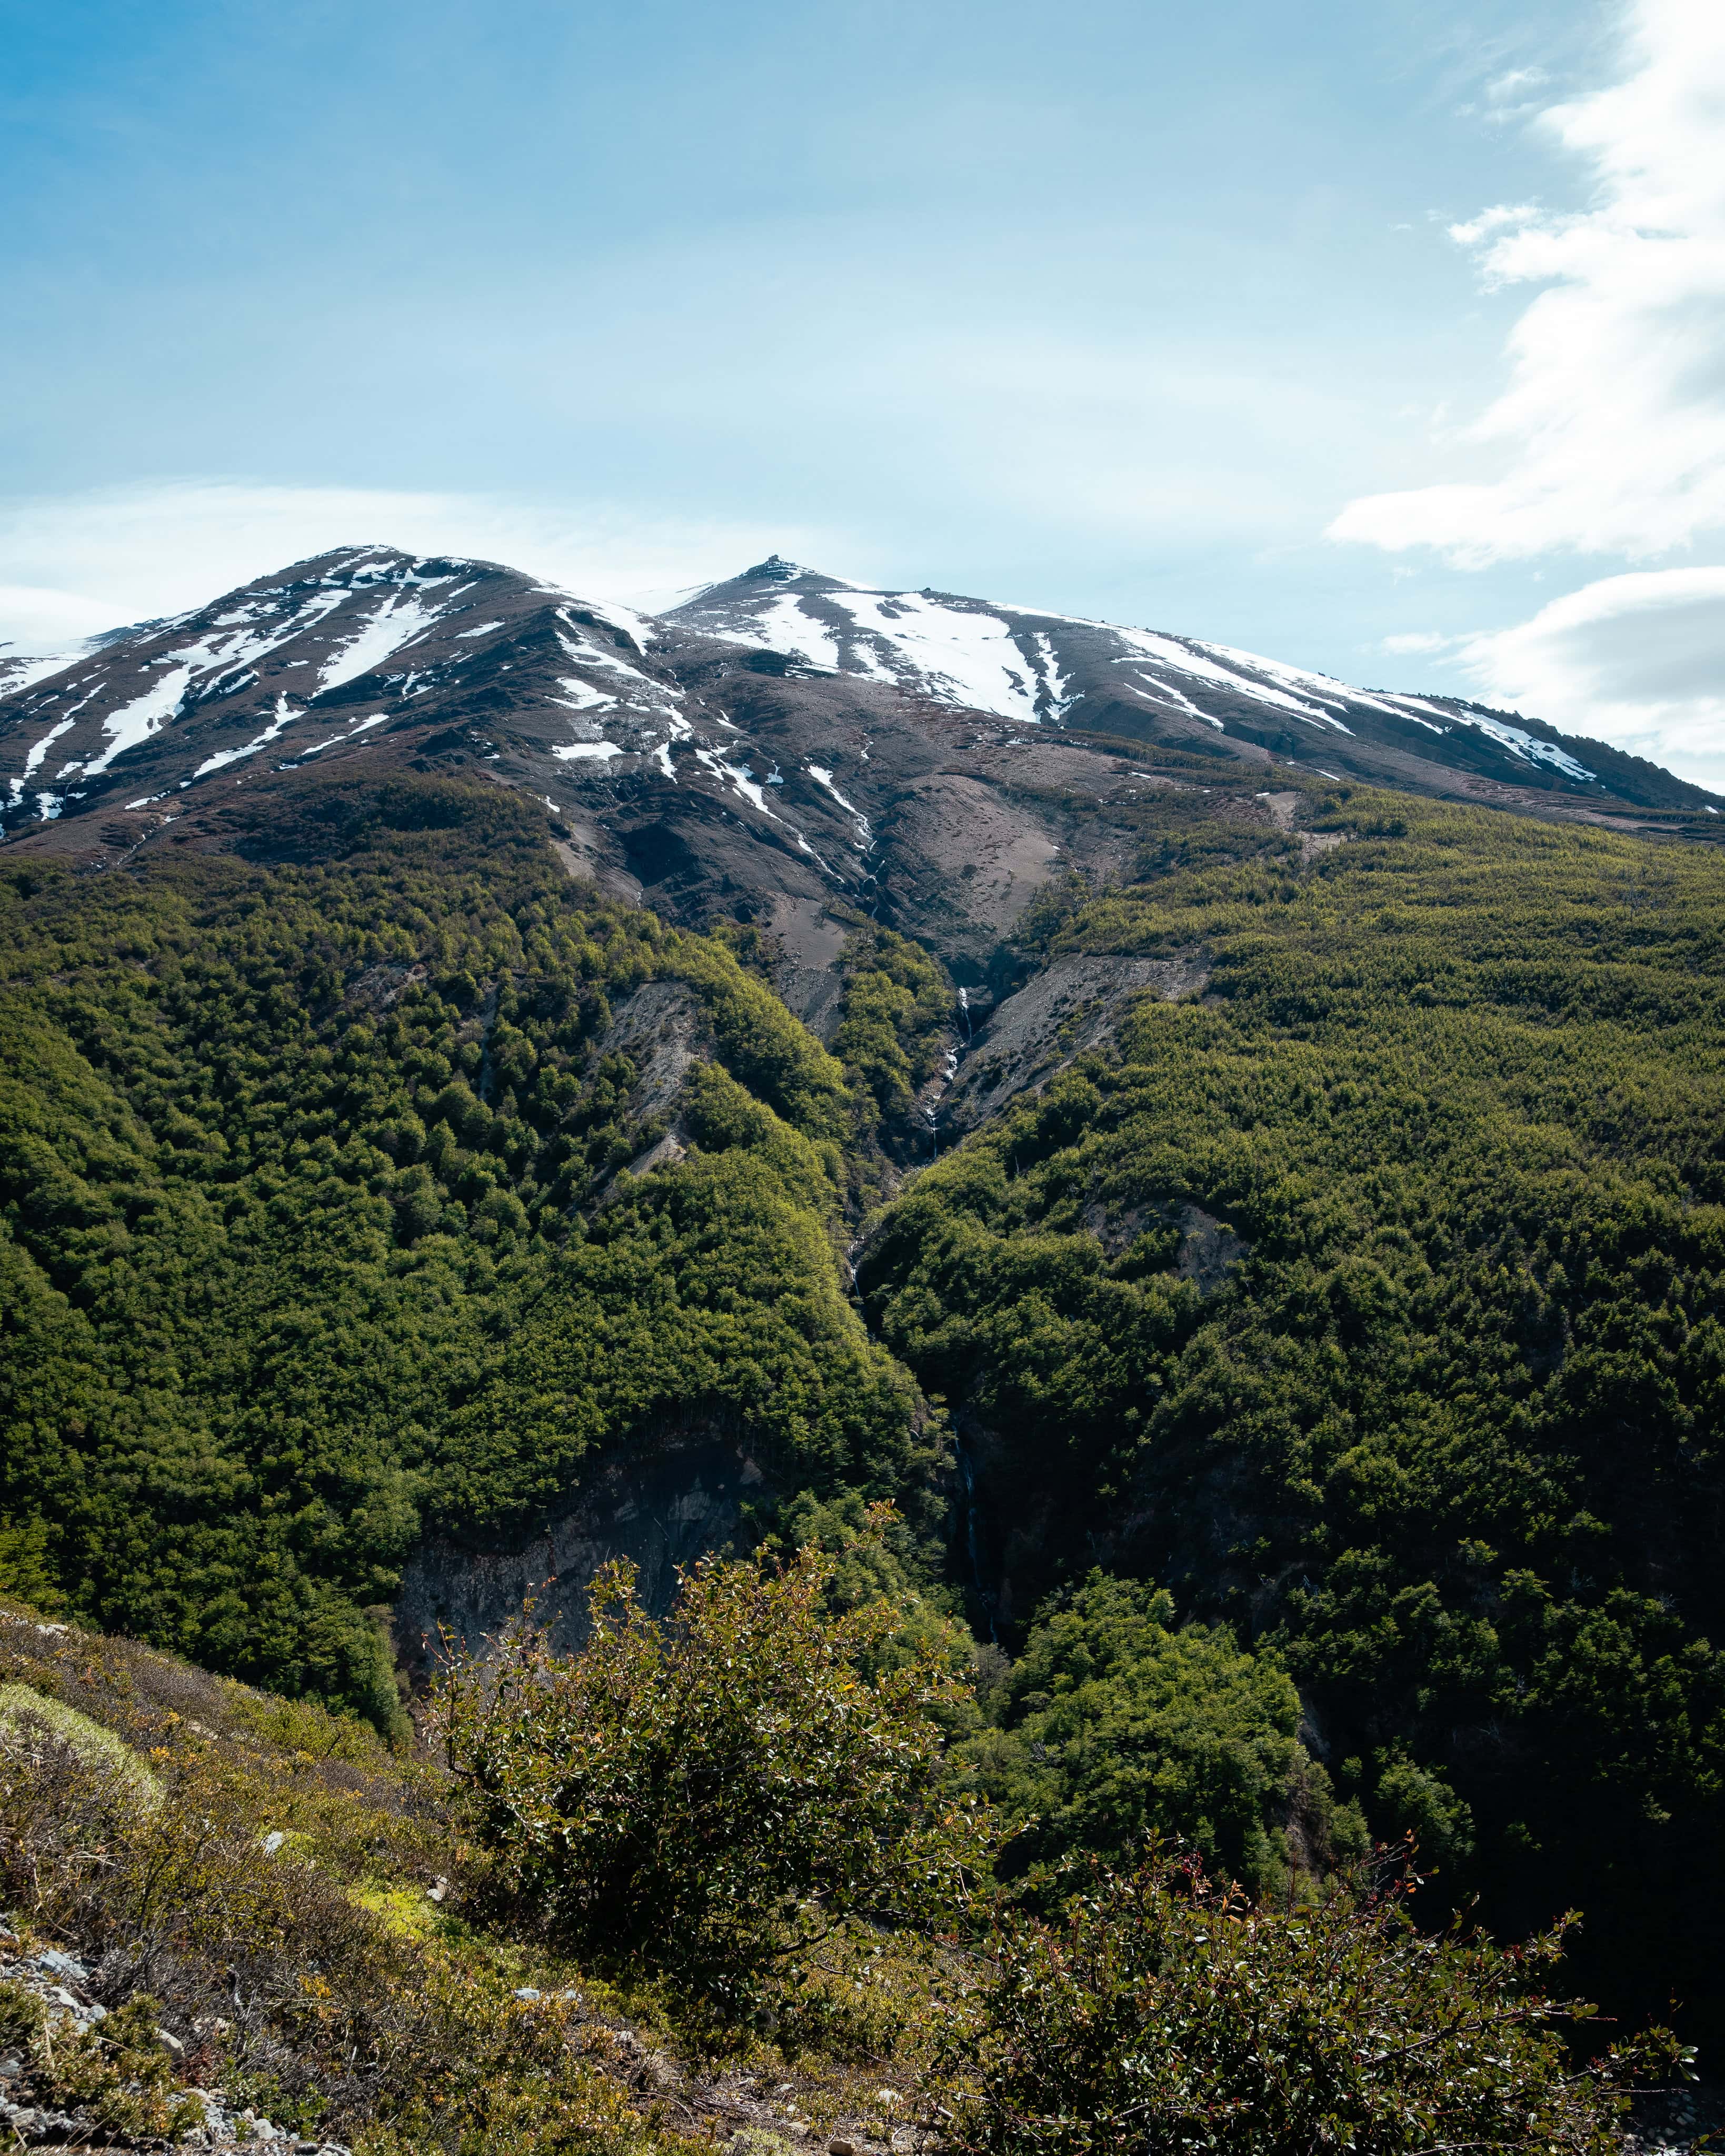
The classic starting point is the Welcome Centre near Hotel Las Torres. The first two kilometres follow a wide, easily walkable path with no significant incline. This section is ideal for getting used to the trail, adjusting your rucksack, and getting a feel for the weather and wind conditions. You can already see the typical Patagonian landscape here, with open steppe and unobstructed views of the Ascencio Valley.
2) Long ascent through rocky terrain with streams
After the flat start, the first long ascent begins. While not extremely steep, it winds its way noticeably over several switchbacks. In places, the trail leads through a rocky ‘stream’ section with many small stones and worn paths, so sure-footedness is required. Although the gradient is moderate, the altitude metres add up. Mental endurance is required as this section takes longer than expected.
3) Crossing along the Ascencio Valley: Up and down the mountainside
The terrain then opens up, allowing you to walk alongside the slope through the clearly visible Valle Ascencio. The path alternates between slight uphill and downhill sections, which conserves energy, but the constant changes in direction make it challenging. The winds can be noticeable and cold in this section, but they offer welcome refreshment after the first long ascent.
4) Refugio/Campamento Chileno (stopover)
At the end of the valley, there is a short descent to the Refugio/Campamento El Chileno stopover. This frequent meeting place offers amenities such as simple food, toilets, and luggage storage for overnight stays. This is usually welcome on the way there, as many people are grateful for this short break. However, bear in mind that on the way back, this section is uphill again and may require extra energy after a long day. If you are planning a day trip along the trail, you will meet most day visitors here.
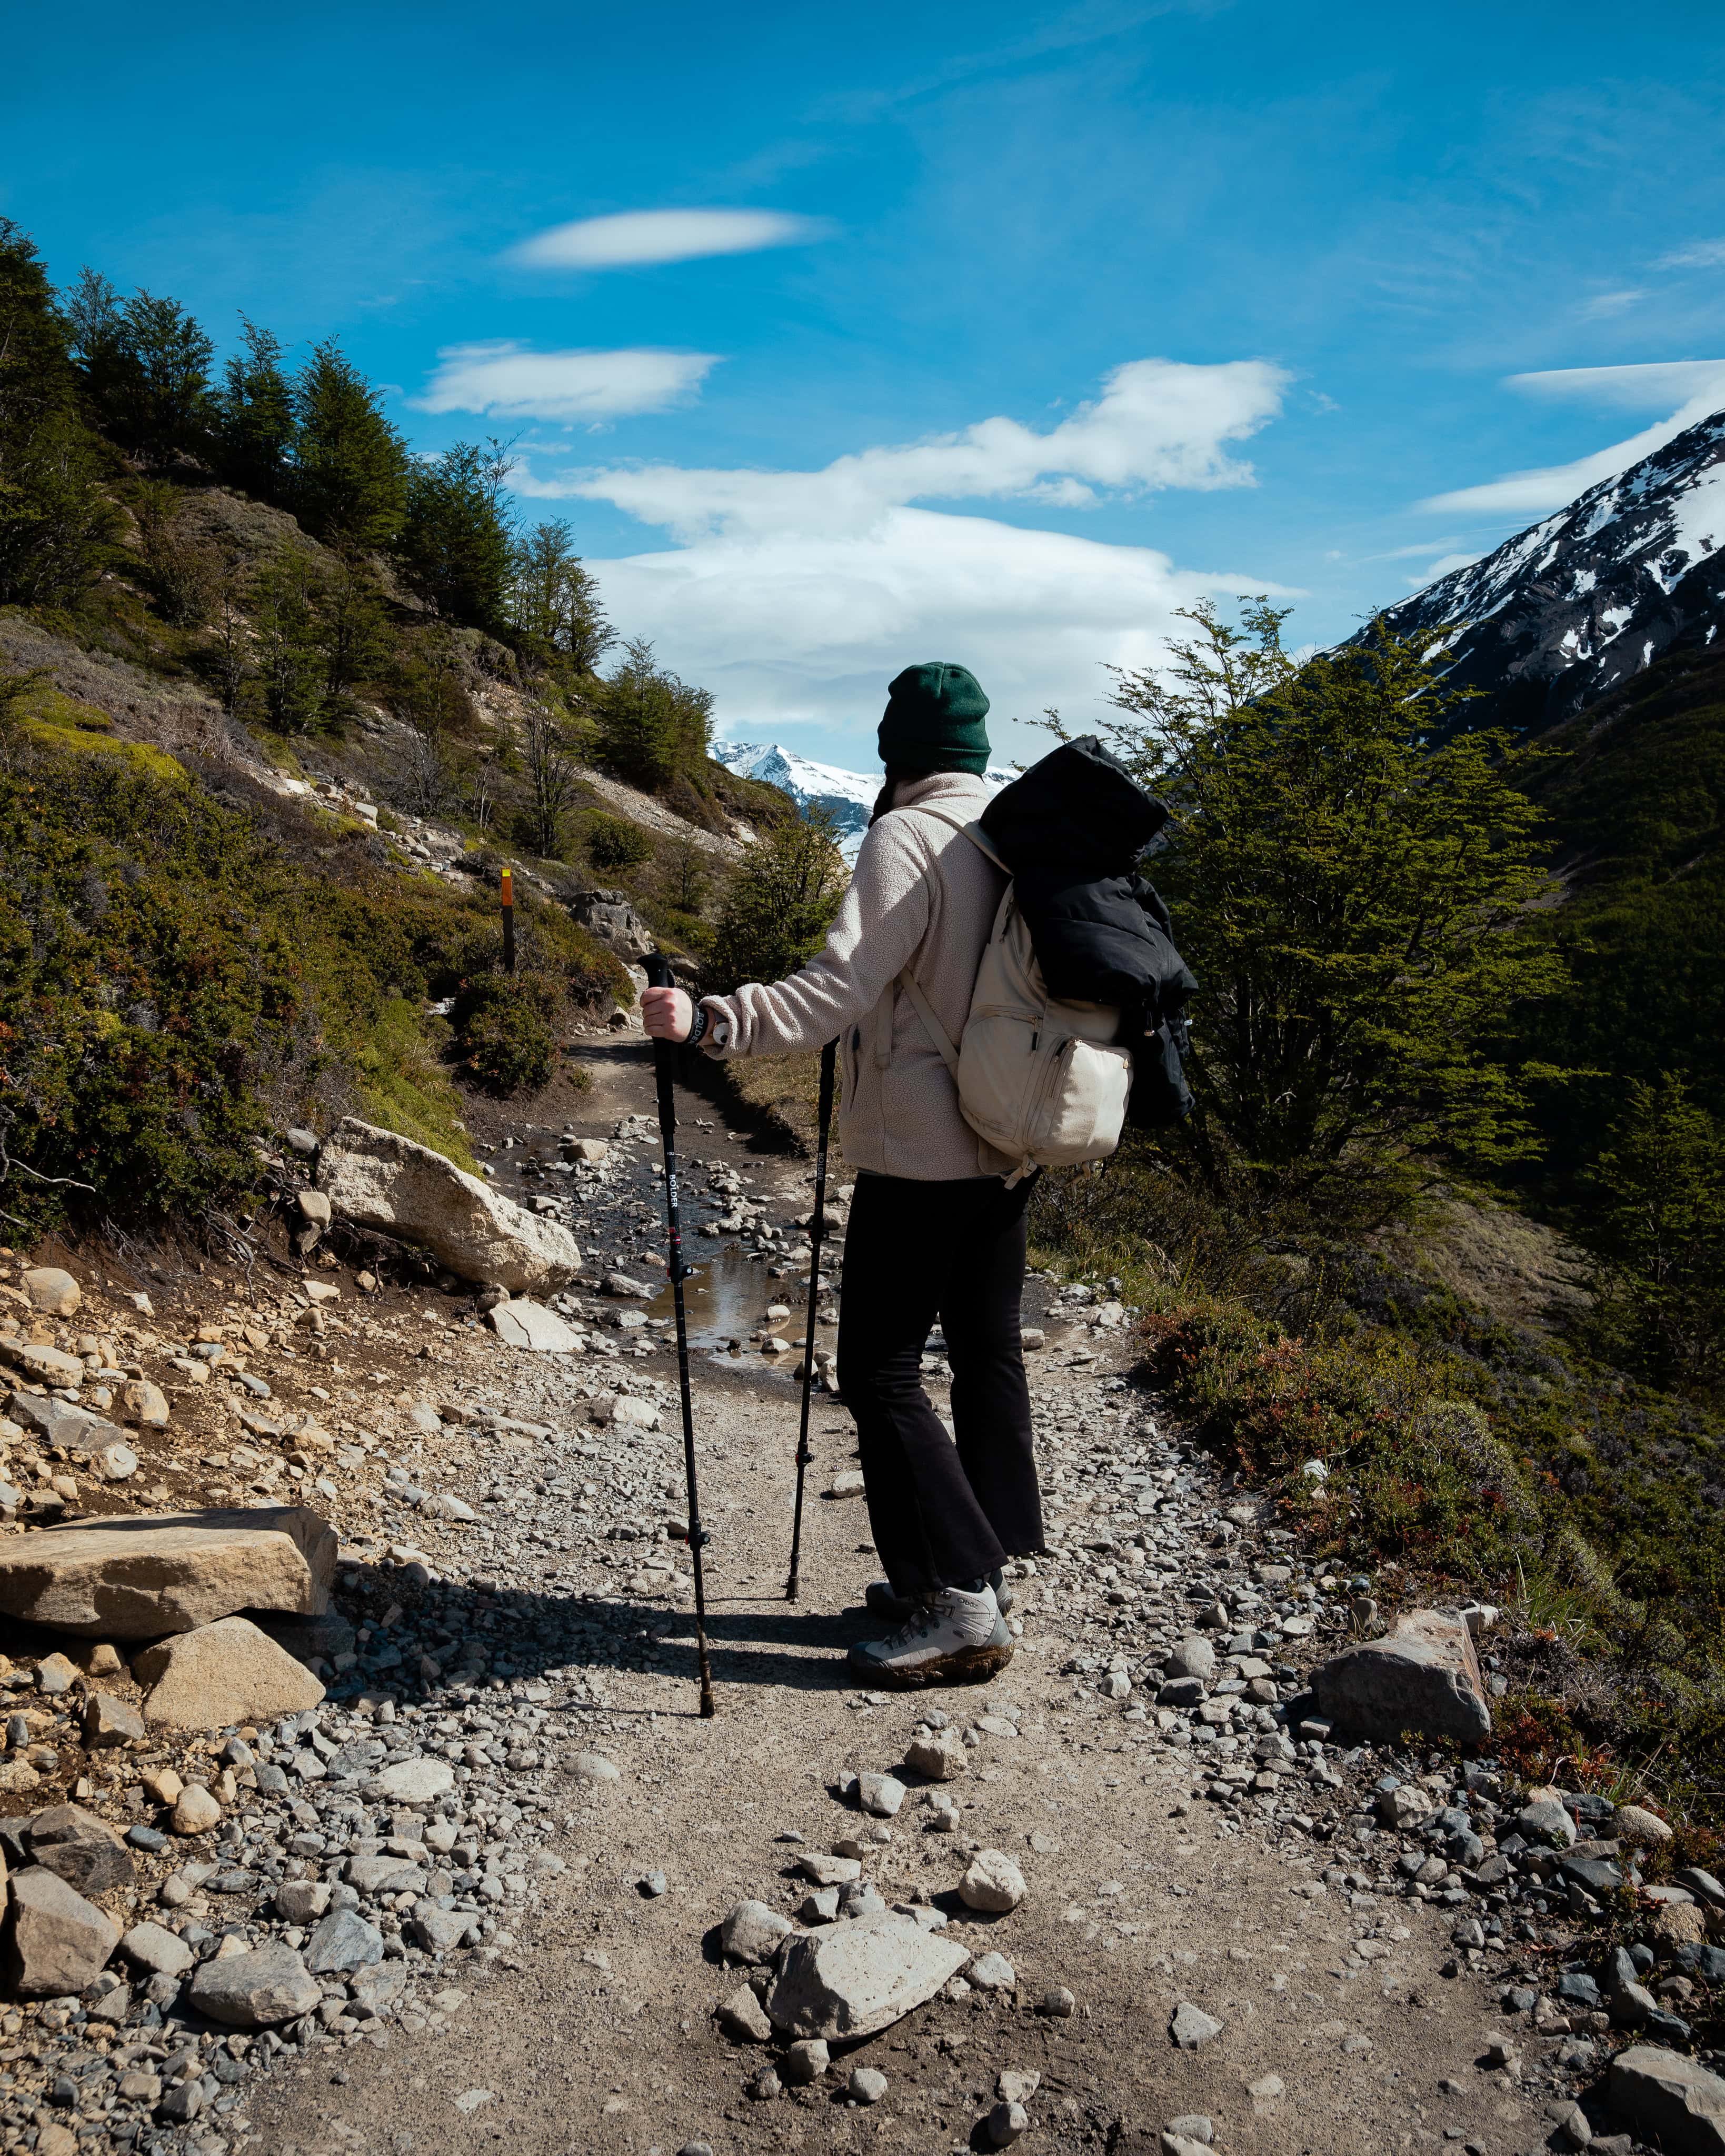

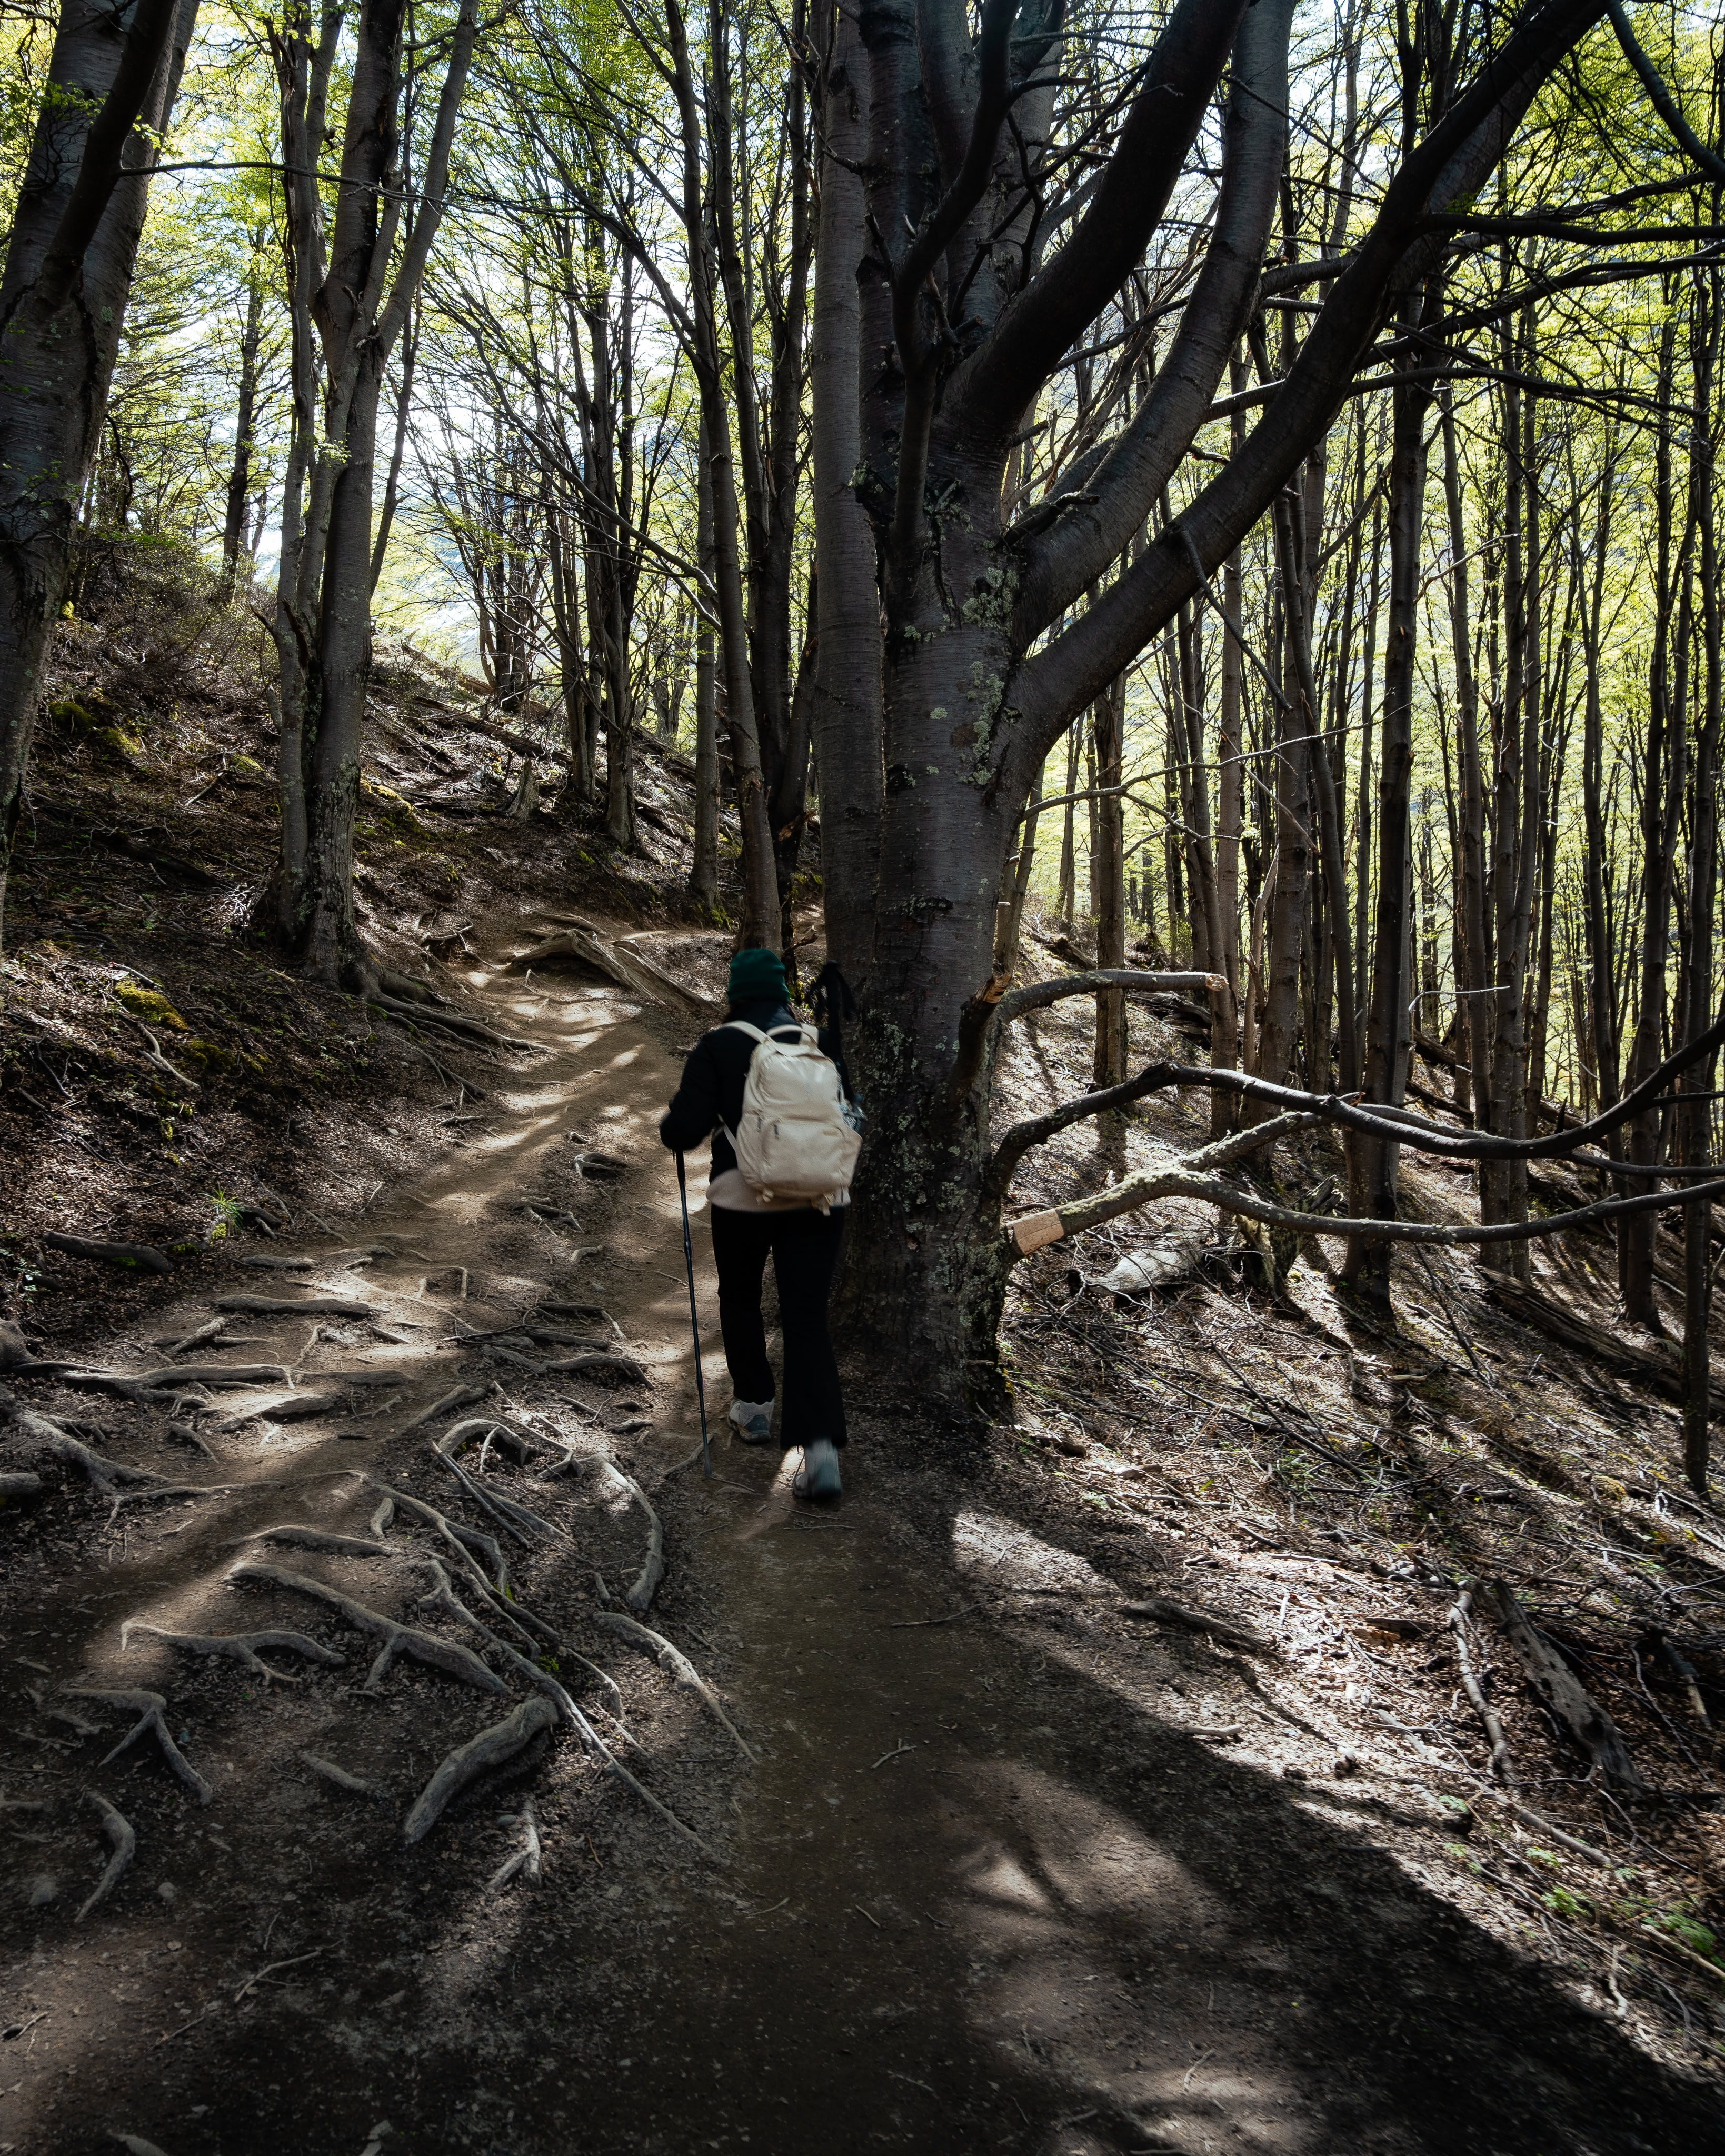
5) Through the forest: A longer, quieter section
After the campsite, the trail leads into a forest of southern beech trees. This section often seems relaxing at first as it is more sheltered from the wind, and the incline appears less steep. However, the trail through the forest is longer than expected, with many root passages, uneven terrain and muddy patches, which can make it strenuous. Nevertheless, it provides mental preparation for the final ascent.
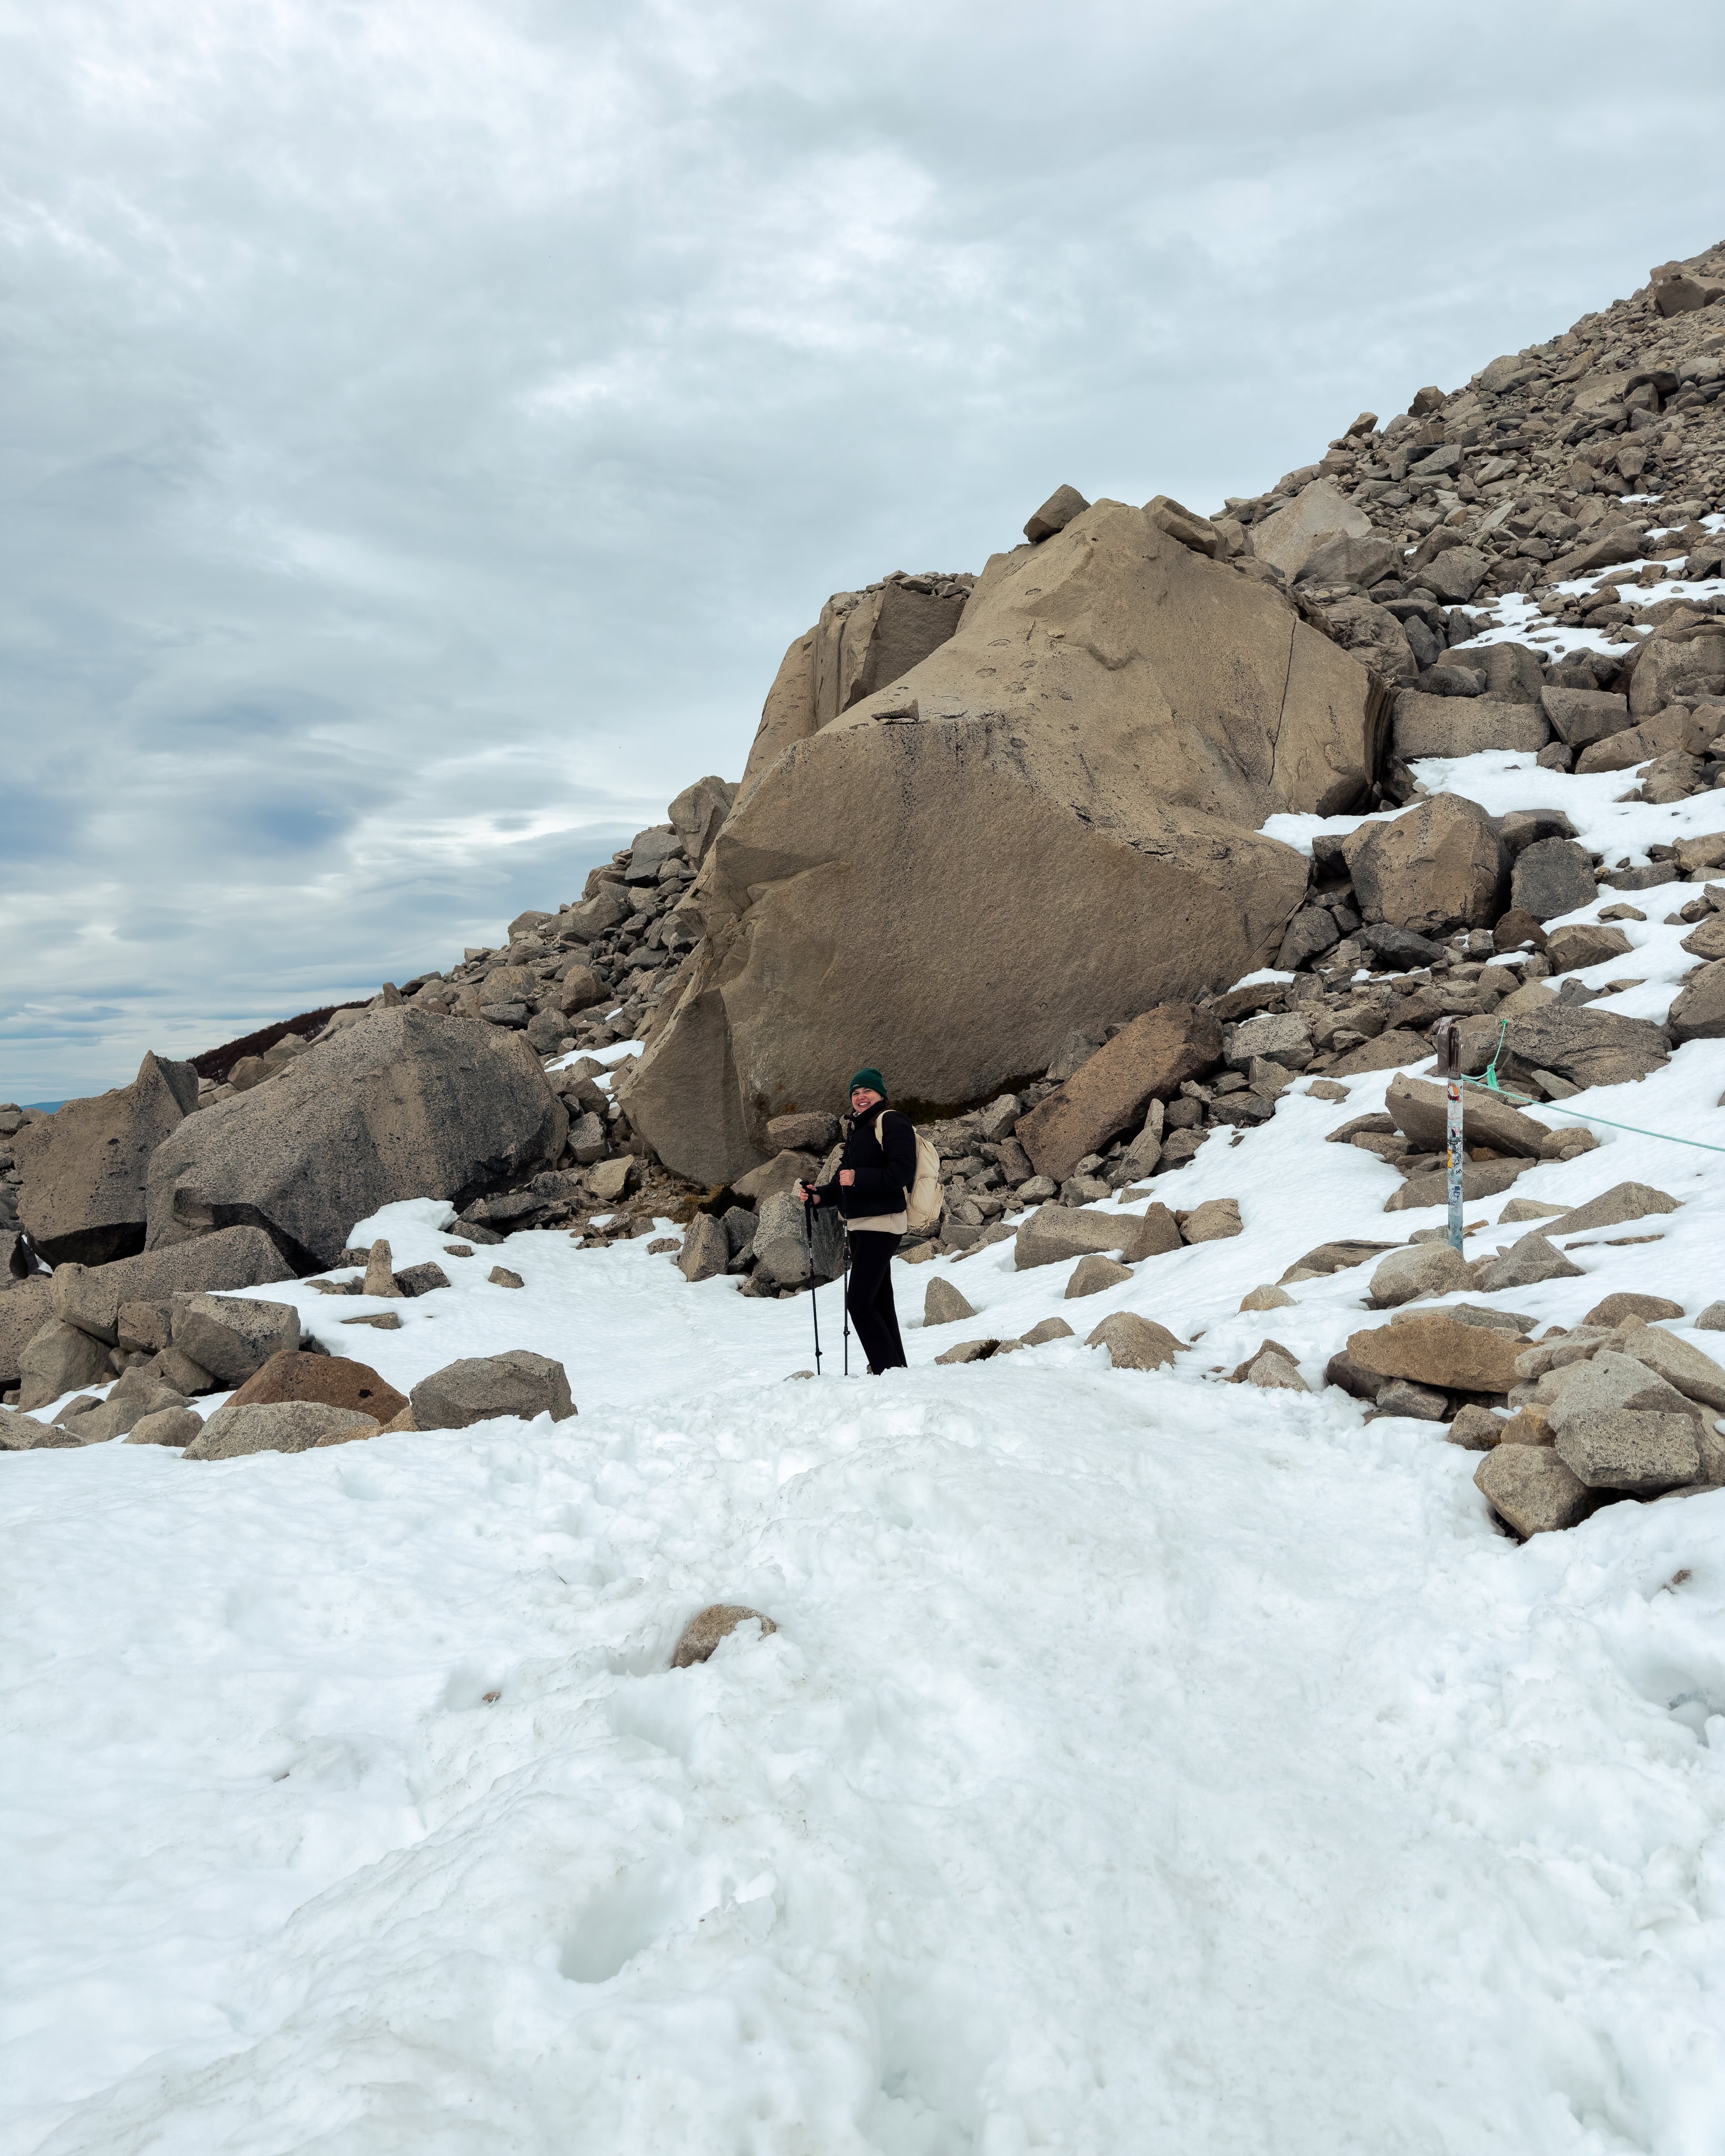
6) Steep final ascent: The 'hard' last hour over the scree field
The final section is the most challenging part of the trail: a steep, partly rocky ascent over a moraine field. Here, you have to climb a lot of metres in a relatively short time. The path is clearly visible, but uneven. Large boulders, loose stones and gusts of wind make this section very strenuous. Fitness and sure-footedness are crucial here.
7) Last crossroads to the lagoon (approx. 15–30 minutes extra)
Shortly before you reach your destination, you will come to one final crossing: a path that leads around a rocky outcrop. This section often takes an extra 15–30 minutes and is often underestimated, as the summit seems ‘visibly close’. Extra caution is required here, especially in snow or ice.
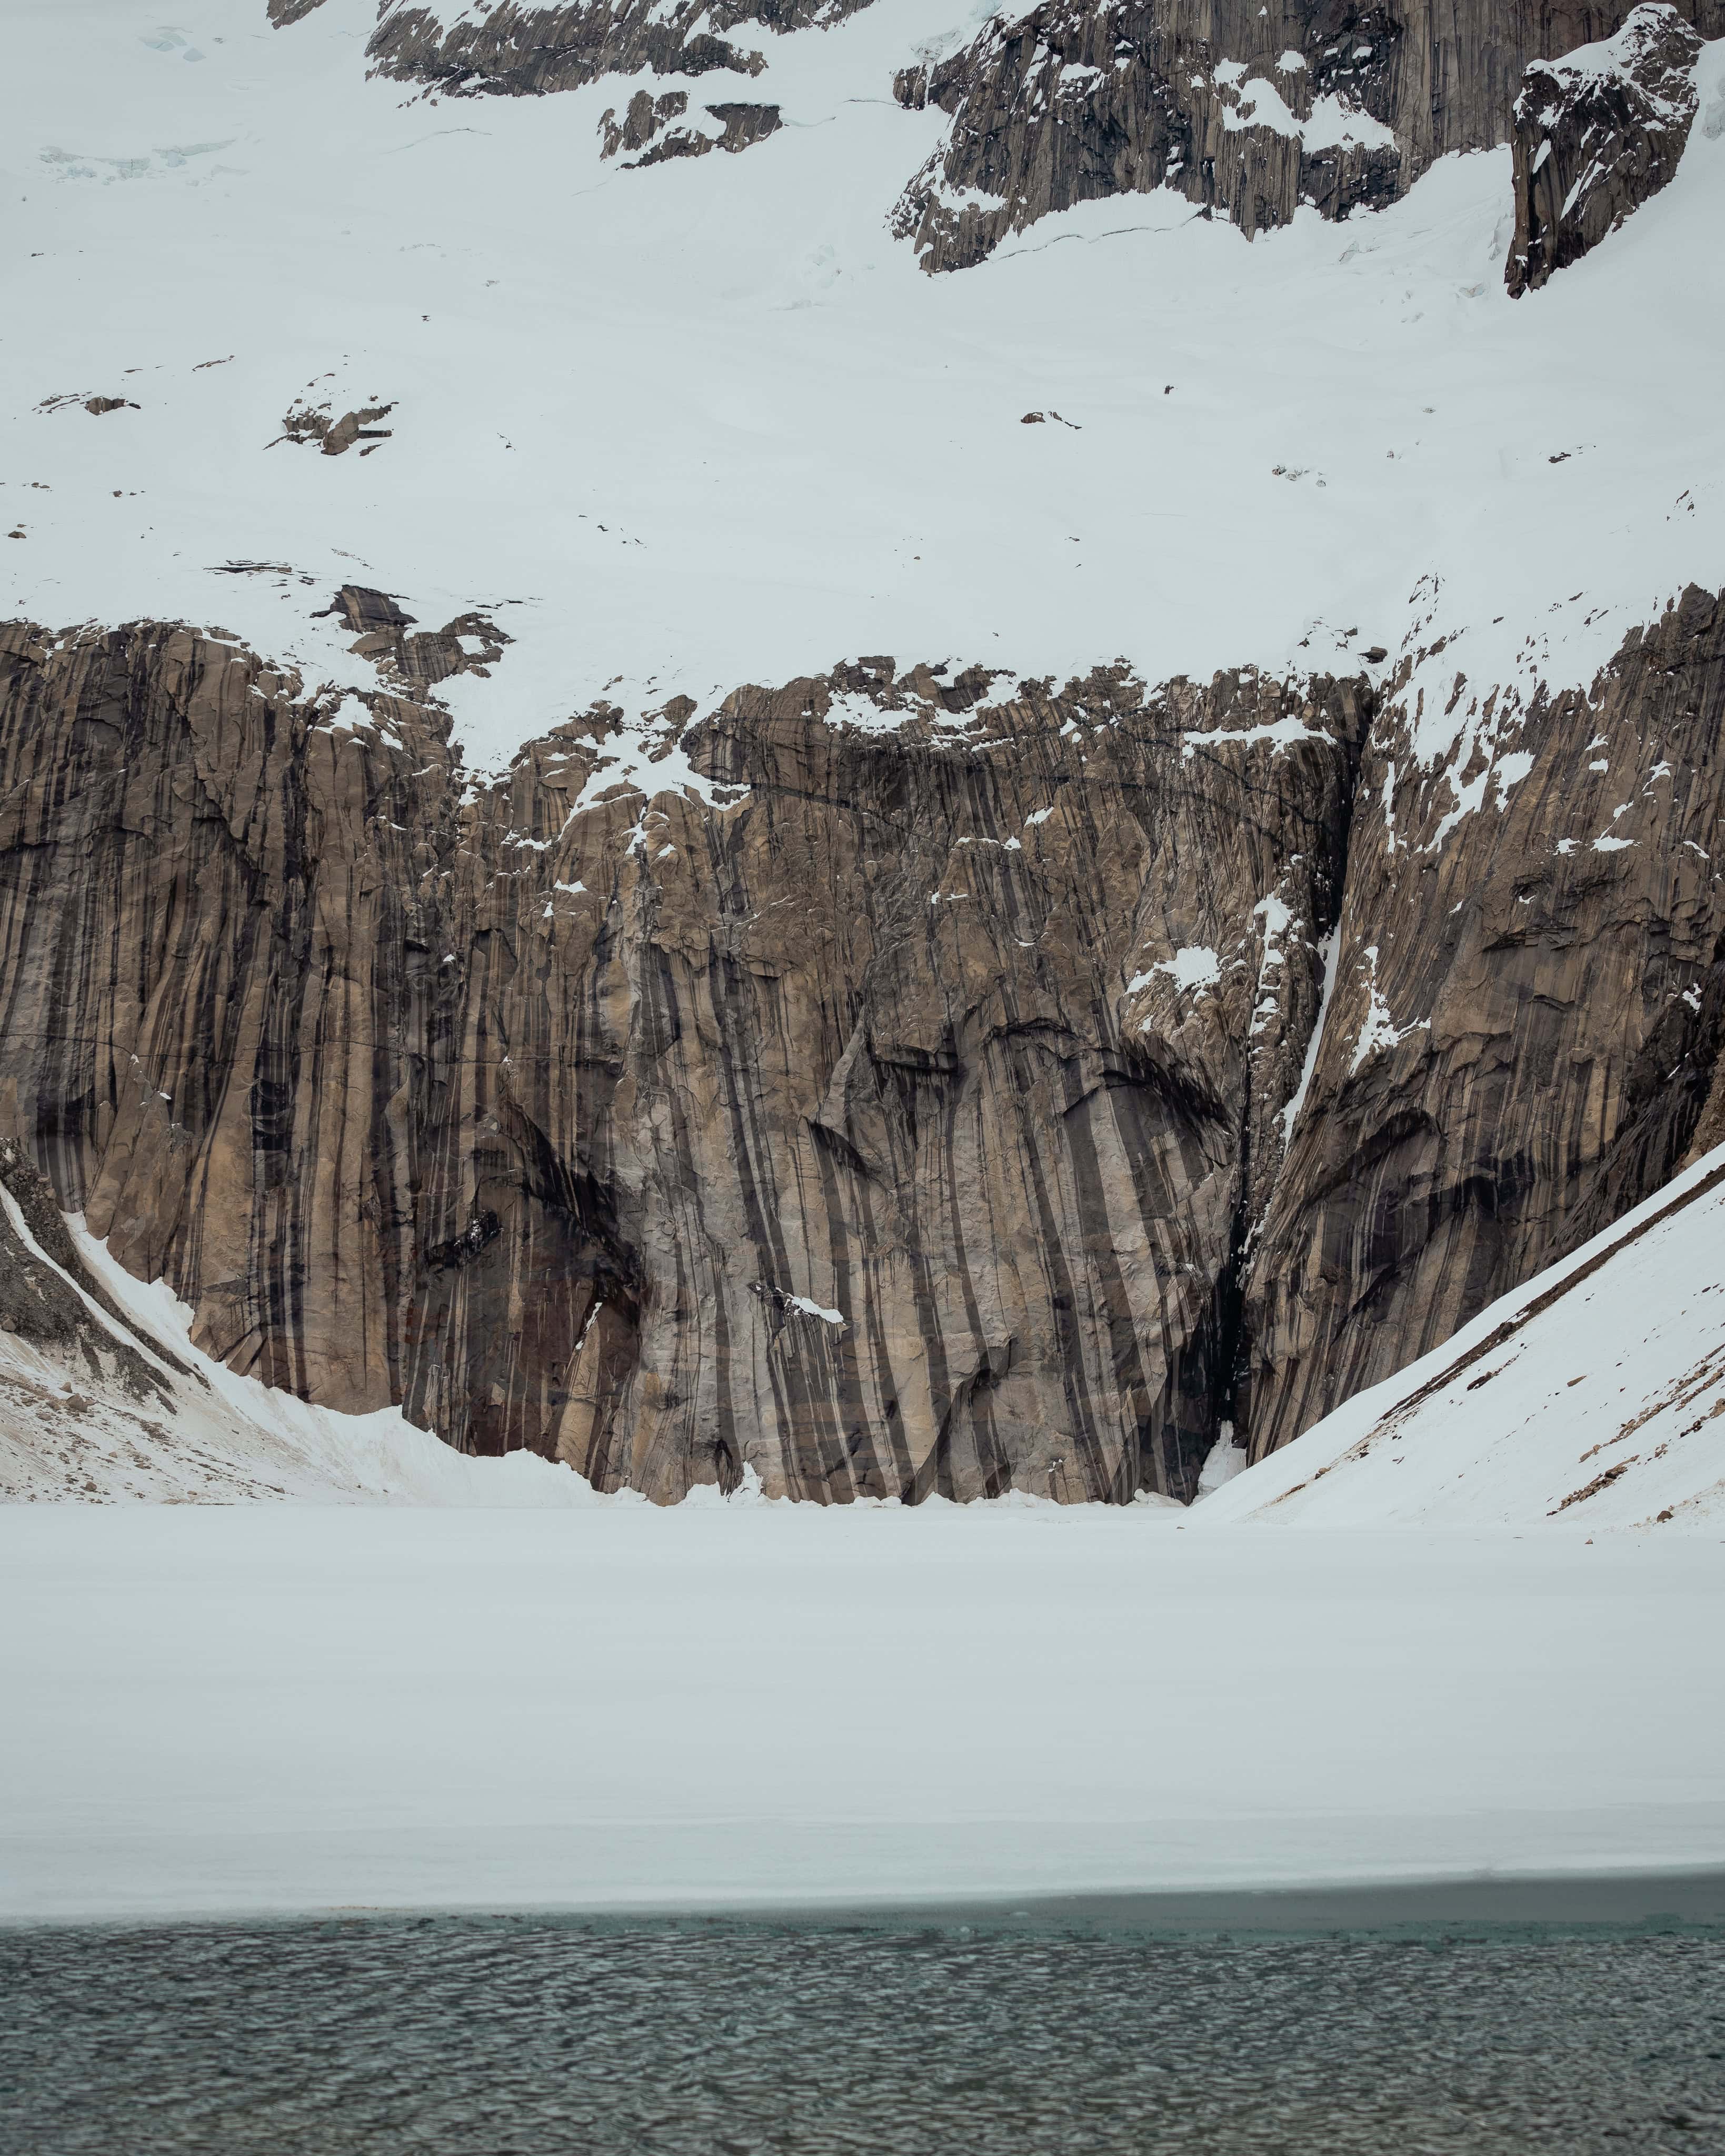
8) Mirador and Laguna Torre: Destination!
Once you reach the top, you are greeted by the classic view of the Three Towers with Laguna Torre in the foreground. Photographers and those seeking peace and quiet can be found scattered along the shoreline. For many, this panorama is the emotional highlight of their entire trip to Patagonia. Allow 20–40 minutes for taking in the view, taking photos and taking short breaks. Bear in mind that the weather can change quickly. Therefore, if the wind and cold set in, do not sit down for too long.
Opening hours, time limits and how much time you should realistically allow
Good time management is required for the hike to Mirador las Torres, as access is strictly regulated. While the
It is particularly important to note that the final ascent to the lagoon is checked and cleared in the afternoon. At around 3 p.m., a ranger begins to secure the area and walks up to the viewpoint. By 3:30 p.m. at the latest (4:30 p.m. in summer), all hikers must have descended. This is because the return journey, including the steep downhill section and the long forest and valley path, takes several hours even at a brisk pace, and nobody should be stuck in the moraine or forest section after dark.
Depending on your fitness level, you should plan at least 8 hours of pure hiking time for the entire tour, or 7 to 10 hours including breaks. The ideal start time is between 6:00 a.m. and 8:00 a.m., allowing you to walk without time constraints and providing enough leeway for breaks, weather changes, or an extended stay at the viewpoint. If you start later, you risk being refused access to the last steep section or having to hike under time pressure.
Practical information on site (safety, weather, timing)
Patagonia is famous for its unpredictable weather: sun, rain, hail and stormy winds can all occur within the space of a single day. Strong winds are common in the valley, especially in the summit area, so light tents, loose hats and glasses are at risk. Starting early reduces the risk of having to make the return journey in the dark and increases the chance of more stable weather. However, starting early does not change the possible wind intensity. Please also note the park opening hours and any possible temporary closures or restrictions (e.g. in extreme weather conditions).
Decision-making aid: Guide – pros and cons
Guide – When it may be useful:
A guide can provide valuable local knowledge, safety advice and logistical support. However, the hike is also feasible without a guide, as the trail is well marked and popular with independent hikers. For first-time visitors, those unsure of their fitness level, or groups with varying levels of fitness, a guide can make the experience much safer and more informative, particularly during the off-season. Many providers also offer transport from Puerto Natales, which simplifies logistics.
No guide (independent) – When this works well:
The hike to Mirador las Torres is entirely feasible without a guide: the paths are marked, the route is well trodden, and there is infrastructure in place. Nevertheless, it is important not to underestimate the hike, especially due to the weather and the final steep section. Self-sufficient hikers must be prepared for emergencies (first aid supplies, extra clothing, sufficient water and energy supplies), as response times for rescue services can be longer in remote areas. If you want to tackle the adventure independently, plan conservatively with less luggage and an early start time, and inform someone of your route.

Detailed checklist: What to bring on a day trip
- Backpack: 20–30 litres for a day trip; rainproof packaging.
- Clothing: Dress in layers with a breathable base layer, a warm insulation layer (fleece or down) and a windproof and waterproof hard shell jacket and trousers.
- Footwear: Waterproof, broken-in hiking boots with good tread and extra socks.
- Water and food: Bring at least 1.5–2 litres of water (more on warm days) and high-energy snacks, as well as a packed lunch. There are drinking water sources available along the way, e.g. at Refugio El Chileno.
- Sun protection and sunglasses: UV protection and sun cream are important, even in cold weather.
- Headgear and gloves: Thin gloves and a warmer pair for the summit area.
- Map/navigation and mobile phone: an offline map app and a fully charged power bank. You may occasionally lose mobile phone reception.
- A first aid kit and personal medication.
- Trekking poles: Highly recommended for the descent and the last steep metres.
- Camera and extra memory: For iconic shots.
- Rubbish bags: Take everything back with you and leave no trace.
Getting there and logistics
The starting point is Puerto Natales, about two hours away. There are daily bus services that take hikers to the park entrance (Laguna Amarga/Welcome Centre). Transfers and organised day trips are widely available.
Park ticket/admission: The park charges an admission fee. Tickets can be purchased online or at certain advance sales points. Prices and periods may vary. Day and multi-day tickets are available. Check the official park website or authorised portals well in advance.
Common mistakes and how to avoid them
- Setting off too late: Underestimating the time required and the weather – so start early!
- Inadequate clothing: wind and sudden temperature changes require layered clothing.
- Wrong shoes: Smooth soles can make the final stretch dangerous.
- Underestimating hydration/calorie requirements: Make sure you have enough energy for 6–10 hours.
- No reserves for bad conditions: Allow extra time and have a plan B (e.g. an overnight stay at Chileno or Refugio, if available).

Conclusion: Why it's worth the effort!
Although the hike to Mirador las Torres is challenging, for many it is the most emotional and scenically impressive day of their trip to Patagonia. The combination of the rugged drama of the towers, the clear mountain lake, and the unique Patagonian light makes the ascent worthwhile if you are well prepared. Whether you go with a guide or on your own, respecting the weather and terrain will ensure you experience a scene that will remain in your memory for a long time.